PhotobucketPhotobucketPhotobucketPhotobucketPhotobucket

780x90

Hello! If you're new to Miss Lovie, I'd love for you to subscribe for free updates! You can subscribe by RSS feed or by email! Also be sure to follow on Facebook and Twitter for more Miss Lovie goodness!
Showing posts with label Creepy Crafty Halloween Event. Show all posts

Wednesday, October 5, 2011

Creepy Crafty Halloween Recap

Wow! what a fun event this was!!


Thank you to all the wonderful bloggers who posted and thanks to you for reading! I have a few new followers...welcome!! I had so much fun and I hope you did, too. If you missed any of the posts from the past week or so, here they are! Click on the link below the picture to see the tutorial.
Halloween Candy Jars with free printable! 

I do have another Halloween project to share with you that was originally going to be part of this series, but it turns out I actually can't do 8 million things in one day. Grad school, teaching, coaching Girls on the Run, and life has got me on overload right now. But don't worry. I can't wait to finish the project and share it with you by the end of the week! 
Happy Halloweeeeeen!
and I'll see you soon.

In the meantime, check out this giveaway! It ends today!

Photobucket

Sunday, October 2, 2011

Halloween Art with A Glimpse Inside

Hello everyone!


I'm Allison (or also an Alli to my family and friends) and I blog over at A Glimpse Inside.
I'm an Army wife with a creative side so I decided to start blogging to share our adventures with the military as well as my crafty endeavors.

I am thrilled Allie asked me to be apart of her Creepy Crafty Halloween Event.
We are currently living in an apartment, well until the end of October, and all of my Fall decorations are in storage so this was a great excuse for me to make some more to somewhat decorate.

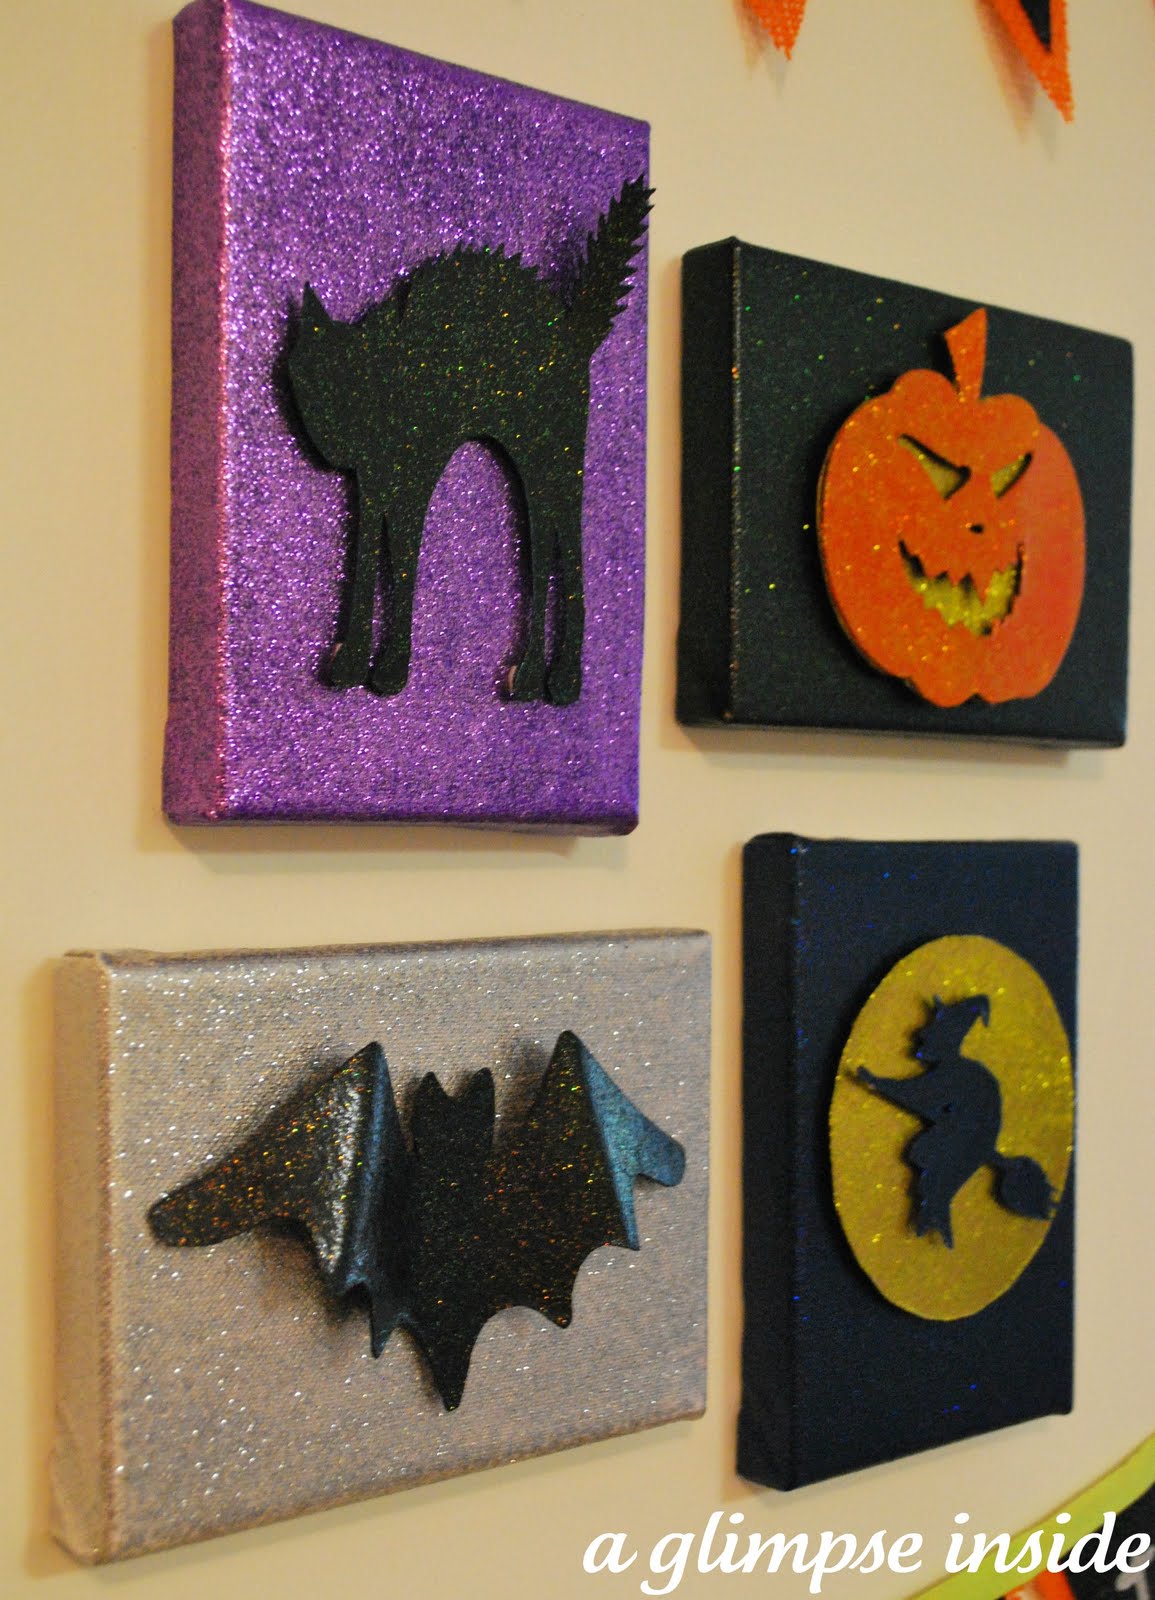
I am here today to share some fun Halloween Art with all of you.


Would you like to see how I did it?
Here ya go!

Supplies:
- 4 canvases (Any size you choose. I used 5 x7)
-An empty cereal box
-Martha Stewart Glitter Paint
-Double sided Foam tape
-Silhouette or Cricut (optional)

How to make them:

I started by painting the canvases with the glitter paint but quickly realized that I needed a base coat of paint first.

So... paint your canvases with a base coat of the same color as the glitter paint you are using.

I painted all 4 canvases: navy, black, purple, and a silver.

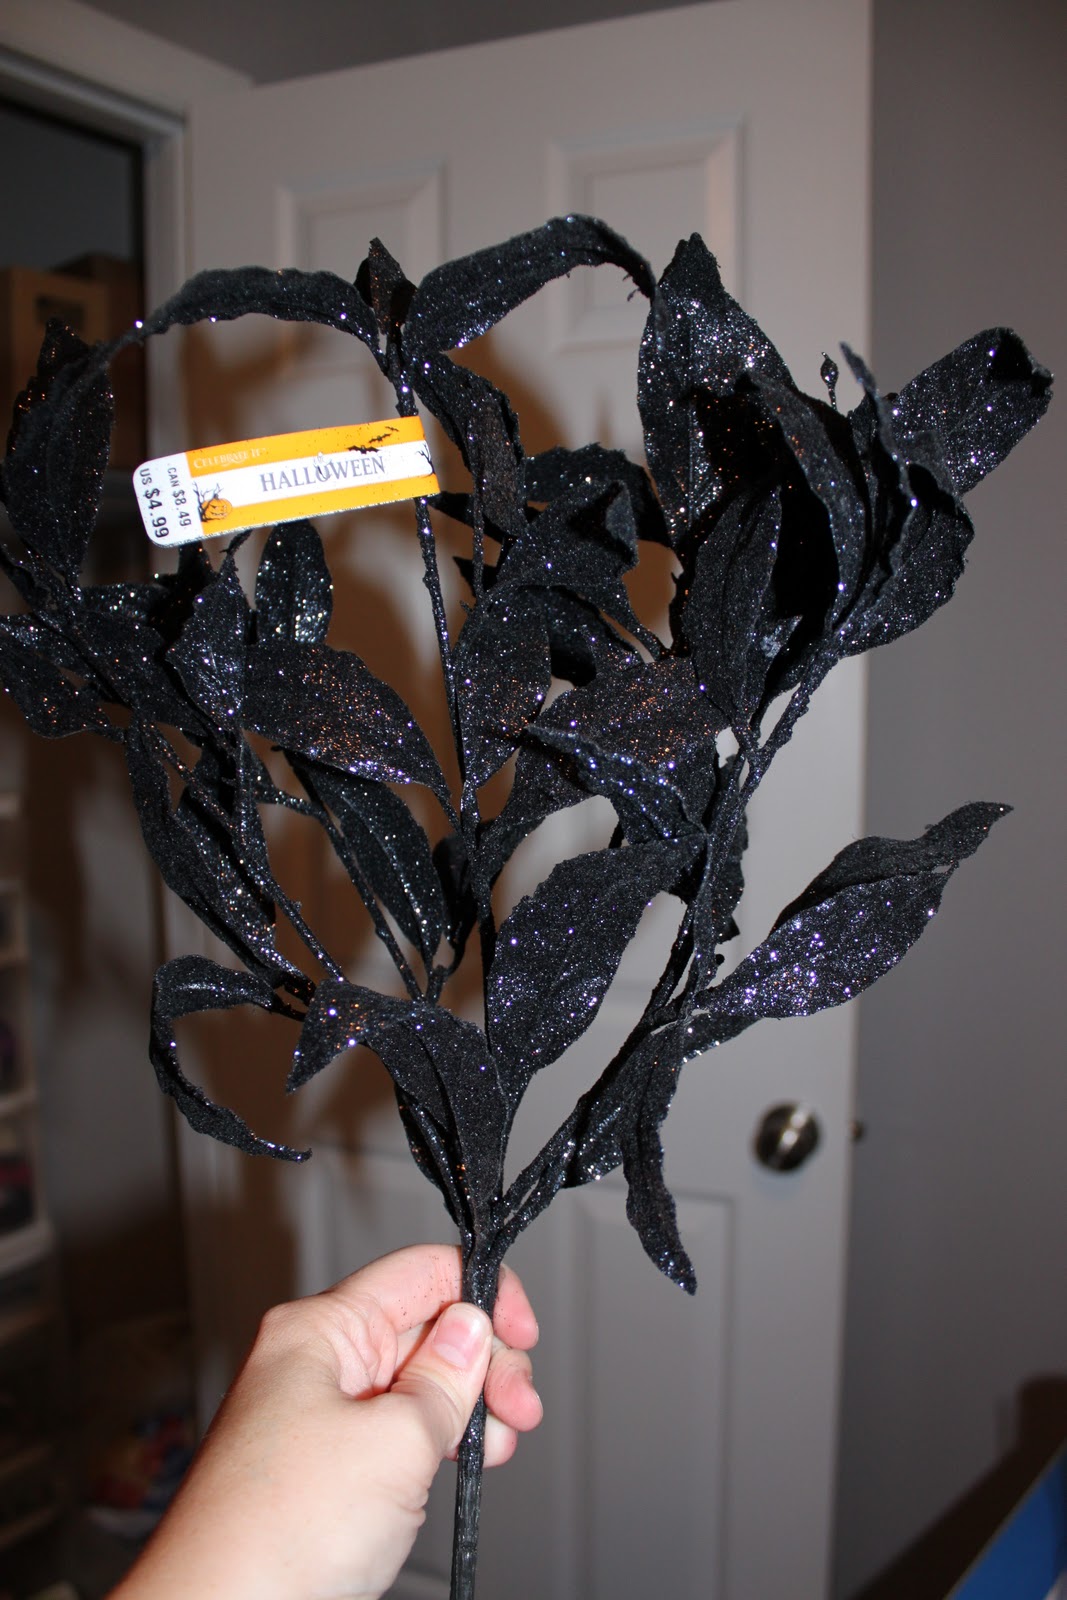
I downloaded some Halloween designs from Silhouette and used my machine to create some templates.

I used regular card stock paper to create the templates.

I then made the cereal box completely flat.

Flipped the box to the plain side and lay your template on it.

Then trace the template.

Do this with all your shapes.

Then take an Exact-o Knife and cut out all of your shapes.

Add a base coat again to the cutouts because you will also coat these in glitter.

Coat with glitter until you get the coverage you want.

I wanted to give the shapes some dimension so I used foam tape to do this.

See the foam?!

I like that you can see the shadows of the top shape on the bottom.
I then just hot glued the side of the pumpkins closed.


Here are some up close shots of each canvas.
Moon and witch:
The moon is raised off the canvas and then the witch is raised off the moon with the foam tape.

Black cat:
I used the foam tape again to raise it off the canvas but I used two different sizes on his feet to make it look like 2 feet are farther back. Then I bent his tail forward a little to add more dimension.

Jack-o-Lantern:
I added the foam pieces in the center and to raise it and then glued the sides together. I then used the foam tape to raise it off the canvas.

Bat:
I bent the wings to make it look like it is in flight.
I added foam to the main body to attach to the canvas and then two small pieces at the very edge of the wings to attach to the canvas.
He is my favorite one!

Here is a side shot of the grouping on the wall so you can see the dimension a little better.

I hung them up with a fun bunting banner to complete the idea.


Hope you like my Halloween Art.
Thanks for asking me to participate Allie!

Feel free to drop by my neck of the bloggy woods any time!
-Allison

Thanks Allison for some super fun Halloween art! I love those colors. I think the cat is my favorite. Or maybe the bat...or...that jack-o-lantern is awfully spooky and awesome...and the witch...They're all great. :) And I love how they're 3-dimensional. 


Please go see Allison on her blog soon! She has so many great ideas. Some of my favorites are her Tasty Tuesday series where she highlights some fabulous recipes, this fabulous shutter decor, and this plaque picture display

Check out this Halloween giveaway going on right now!


And check back tomorrow for the last Creepy Crafty Halloween post: me! 
Photobucket

Saturday, October 1, 2011

Plants Vs. Zombies Attack with Tidbits from the Tremaynes

Here's Mandi from Tidbits from the Tremaynes! Enjoy!

If you don't know me, than you simply must know that I adore Halloween. I am big, BIG! into the Halloween decor/activity.
It's a way of life in our house. Honest.
Anywho, this year I've combined my love for my favorite holiday, and my favorite video game.
What's my favorite video game, you ask? Thanks for asking.

I now realize that while I thought this game was as well known as, oh, say "Angry Birds" or even "Mario", tis not so.
If you don't know this game? Besides that it makes my little project not even half as cool, you also must promise to go play. Cross your heart.
But back to this project-- can you imagine a Plants Vs. Zombies attack on my front lawn for Halloween? Can you??
So I got to work.

And I may be the only person left on the planet who would use a projector with transparencies. It's just how I roll.
I'm a firm believer that everyone should keep a sheet of plywood hanging around in the garage for just such emergencies. Got to painting:

and then cutting these bad boys out with a scroll saw,
and here we have the good side:

and the dark side:

Man, I love this game.

And my kids think this is the coolest thing I've ever done. Which is pretty sad, actually.


Ha! Thanks, Mandi for that unique Halloween decor idea. Creepy and hilarious. I will definitely need to go look up that game...


You should all know and love Mandi. She's super great. I  found her blog through browsing the second season of Crafting with the Stars Competition, (which Mandi won, btw.) I remember seeing this Pottery Barn Knockoff Paneled Mirror and thinking, dang. I love that. I was intrigued. Then I started browsing and found out she had crazy skills. I mean crazy. 

If you go visit Mandi, you will be blown away, too. Here are some of my favorite project posts of hers:

But what really drew me to her blog and I know it will suck you in, too, is her fabulous sense of humor like in this post and this one that make me laugh and just be glad that her blog exists to make me smile.

Now Mandi is a crafting star for the Crafting with the Stars Competition. Round 1 starts Monday so be sure to check it out!

 Check out the Halloween giveaway going on now! 
And come back tomorrow for another great Creepy Crafty Halloween guest!!  
Photobucket

Friday, September 30, 2011

Eek! Spider Wreath with Teach. Craft. Love

Hi Miss Lovie Readers! 

This is Dara from teach.craft.love. I am so excited to guest blog today for Allie's Creepy Crafty Halloween event. I will admit Halloween is not my forte but I am excited about hanging this little wreath out to celebrate. Hopefully it will inspire a few more ideas inside my home and I'm loving all of the other greats ideas that have already been posted!


This is a pretty simple project. All of my materials are from The Dollar Tree and Michael's. I hope you like it!

Materials:
  • wooden wreath
  • black spray paint
  • glitter or glitter paint
  • webbing
  • spider
  • letters
  • white paint
  • ribbon
  • leaves/foliage in Halloween colors/glitter
Step One:
Spray paint your wreath and then add a little of this glitter paint/glue. You can barely see the glitter from far away but I know it's there. And Halloween is the best time for glitter! :)


This is what the glitter looks like before it dries. Be sure to give it a pretty even coat. It's more or less like mod podge with the glitter already in it. 

Step Two:
Stick the leaves/foliage in through the wooden vines


I didn't wire all of the pieces. They seemed to stick without it but a few stuck out so I used floral wire to pull them closer to the wreath.

Step Three:
Drape webbing around. Add as much or as little as you like!

Step Four:
Tie your spider around the wreath. The one I bought (Dollar Tree) had an elastic band around the top so I just used that to attach the little guy.

Step Five:
Paint letters. I added a coat of white paint and then two coats of the fantastic glitter paint in orange.

Step Six: 
Hot glue letters to wreath.

Step Seven:
Hang and creep out your neighbors!


I hope you find inspiration from this wreath and have a very Happy Halloween!!

P.S. Please ignore the poor picture quality/lighting. I finished this in the evening and didn't have a chance to take daylight pictures. 

Thanks for reading and I hope you'll stop by my blog sometime!
~Dara

What a cute wreath Dara! I love the spider webs and glittery leaves! Thanks for this creepy wreath inspiration! Wanna see more fabulous wreath inspiration head on over to Teach.Craft. Love. and
check out more of her gorgeous wreaths like this cork wreath and fall rosette wreath, these book page wreaths, and this gorgeous house number and flowers wreath. She really is a master wreath-maker.


Dara is my real life friend (and also my blogging friend.) I love her to pieces. She's actually the one who made me take the jump of creating my own blog. She started Teach.Craft. Love. and so I said, well fine, I'll start one, too. And I'm so thankful that I did. So thanks, Dar. :) 


Click below to check out the giveaways going on right now!!
And check back tomorrow for another super Creepy Crafty Halloween guest

Photobucket
Related Posts Plugin for WordPress, Blogger...

invisible ad