Welcome back to my Back to School Event! I hope you've been enjoying this week's posts and the guest bloggers. Be sure to stick around because I've got more fun projects and guest post projects coming up!
Today's project is done by me! :) This post is for teachers mostly, but you could also use the ice cream pattern and ruffle border tutorial I will be providing for party planning, paper crafts, or anything else your crafty little brain can think of.
(p.s. Sorry about the colors of the photos in this post. The light inside our school hallway is awful.)
Every year teachers wrack their brains for back to school bulletin boards. Of course I ran straight to Pinterest for ideas and found this gem:
Idea found at One Stitch Two Stitch
I thought the idea of ice cream or cupcakes would be so cute. Since I don't especially love cupcakes, I changed the idea to ice cream.
I probably could have found ice cream cut outs at my local Parent Teacher Supply store, but what would have been the fun in that?! So I got some scrapbook paper and made my own. The scalloped top is supposed to resemble and ice cream shop awning. I got this idea from One Stitch Two Stitch, as well.
Of course, the kids' names go on the ice cream cones. This picture was taken after the names were on the cones, but I blurred them out for their protection so that's why the ice cream looks funny.
If you would like to make your own ice creams, you can get my pattern for the scoops and cone here.
I adapted the actual scoop pattern from here.
You know this crafter has to work in a little scallop bunting into my bulletin board. :) A tutorial on how to do this is coming up tomorrow!
On to the ruffle border....
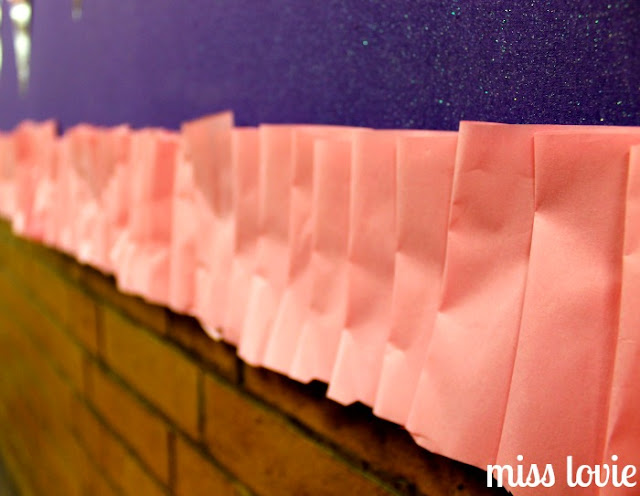
I originally had store-bought border up, but it just didn't look right. I didn't want to make a trip to the store or spend money so I just made my own. I've seen the scrunched paper border on a few teacher blogs before, but I wanted mine to look a little cleaner so I created some ruffles/pleats with the paper.
You could make the pleats straight all the way across for a clean, polished look...
or a little wonky for a fun, textured border.
If you'd like to make your own ruffled paper border for your bulletin board or party decor, read on.
Ruffled Border Tutorial
Materials needed:
Butcher paper cut into strips
Stapler
(and that may have been the shortest materials list I've written EVER)
Staple a strip to the top of your bulletin board with the edge flush to the top and the rest of the strip hanging down. Then folded it up on itself and staple. Don't actually crease the fold-let it stay soft-looking and more like a ruffle.
Keep going and staple each ruffle onto the previous one. Try to cover the staple with the next ruffle, but if you cant', it's ok-it is a bulletin board after all. If you want to change things up, you can staple the ruffles on at angles to create a fun look. When you get to the end just staple the last ruffle up as you can see in the picture above.
Staple another strip on top of the previous ruffle just like you did before and then make a large first ruffle to cover the edge of the paper so it looks like one continuous ruffle.
I did not take the time to cut my strips the same width or evenly at all so when I was finished my border was everywhere, but that's ok. To make it even just cut up the edge of each side.
And now you have a nice ruffly border that is FREE! Any teacher loves free.
I hope you love these ideas as much as I do!
Have a lovely weekend!
Come back tomorrow for that easy paper bunting tutorial and the rest of this week for more Back to School fun!


10 comments:
What sweet cute signs! I bet kids will love them! xo Holly
Awesome idea for a interactive bulletin board too!! Match the scoops to the cones! Did you use fabric for the background?
Love this idea!!
Adoreyou.vn
Chuyên:
Khuyên tai
Khăn len
Mộc Quang xin kính chào các bác!
Chúng tôi rất hân hạnh được mang đến các sản phẩm vòng tay phong thủy gỗ quý: gỗ Huyết Long, gỗ Sưa đỏ, gỗ Trầm Hương,..được làm hoàn toàn thủ công từ gỗ 100% tự nhiên. Xưởng sản xuất của Mộc Quang được đặt tại làng nghề Nhị Khê – ngôi làng có truyền thống hàng trăm năm nghề tiện gỗ. Hy vọng được các bác ủng hộ.
Trân trọng cảm ơn!
Phu tung xe mercedes
Da phong thuy
Cúp pha lê | Cúp Golf
https://maytinhtrananh.vn/sua-may-tinh-may-in.html
https://phalebinhminh.com/
Post a Comment