


Happy Birthday, Dr. Seuss!
In this post you will find my Dr. Seuss classroom door decorations and a tutorial on a cute little Truffula Tree craft for kids!

So I really really really love The Lorax book.

It's such a great story. I was so surprised by how many people I've heard lately say they've never read it, too. Go read it! I am SO pumped for the movie to come out. I'm hoping to go see it soon! No, I don't have kids. Yes, I love animated movies. What?
When my hall at school decided to do a door decorating contest for Dr. Seuss' birthday I knew what book I had to do. the kids are actually supposed to pick their favorite....but, well, I kind of picked mine. Sorry kids. I knew they'd love my idea, though and since the movie was coming out, I thought they'd be at least a little more familiar with The Lorax, at least.
So here's our door. The final product. :)

I'm kind of in love. It's hard to see (1. because it's hard to take pictures of an entire door, and 2. I don't have permission to show you the kids' faces anyway) but the pictures are of all my students with a Lorax mustache and eyebrows I made, cut out, holding their own Truffula Tree they made.
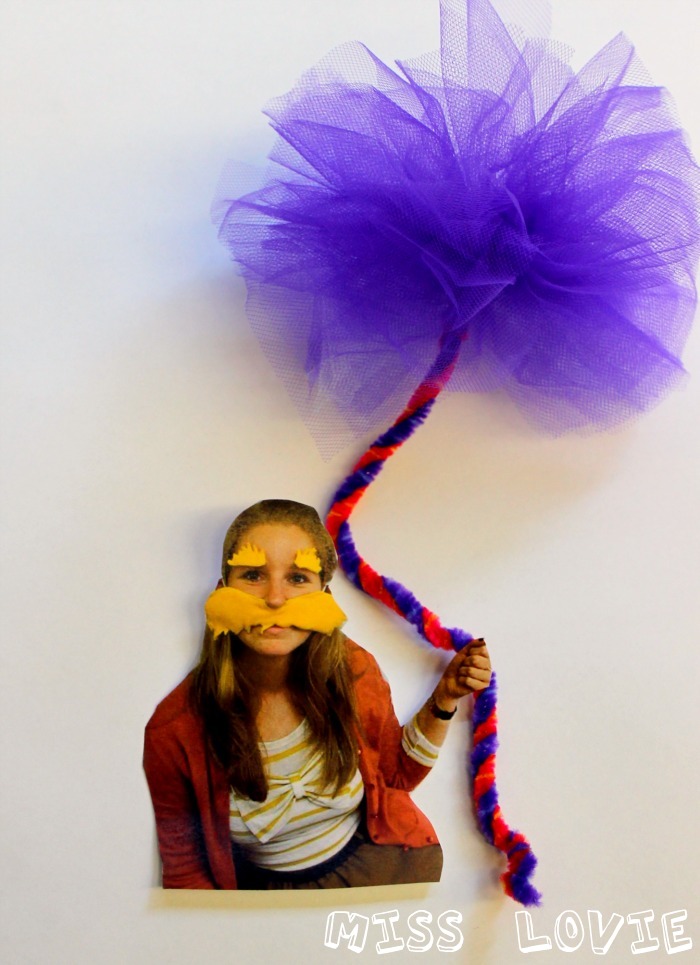
Here's a close up of me on the door with my Truffula Tree

Keep reading! At the bottom of this post is a tutorial on how to make your own cut out and Truffula Tree!
So the kids' pictures are way cuter than mine. One of my kids could totally pass as the Lorax. Hilarious.

We are all sporting this fabulous mustache and eyebrows. I found this tutorial and whipped it up the morning before school the day we took all the pictures. Instead of using a stick to hold up the mustache I used elastic. I figured this would be easier for the kids. Especially since they had to hold their imaginary tree in the photoshoot.

I made the eyebrows for fun too. I made both eyebrows and mustache using no-pill felt (on sale!) the same way the tutorial says except I placed some card stock in between the two layers when sewing so the mustache and eyebrows would have more stability. I just used regular tape to attach the eyebrows. We just needed them to stick for the picture so it worked fine.

I just love that Lorax guy. :)
I traced both the Lorax and Onceler below using a projector with a black magic marker on construction paper. Then I cut them out and glued them in their spots on the door. I simply backed our Lorax friend with a strip of cardboard so he would stand up and pop out of the Truffula Tree.

The Onceler's window is actually purple like it is in the book. Not sure why it's showing up pink here.

I free handed the large Truffula Tree, and free-cut the letters of "The Lorax". The 3rd and 4th graders voted and we'll find out next Friday who won the contest! I'll keep you updated!
I hope you love it as much as I do!
Click on over to my teacher friend's kindergarten blog, Ketchen's Kindergarten, to see more Dr. Seuss Door ideas!
Now. Want to make your own little Truffula Tree?
I know Dr. Seuss' birthday is over, but this would make a fun craft at a Dr. Seuss themed birthday party or just a fun craft after you go see the movie!
If you wanted to get really crazy, you could make the Lorax mask and eyebrows like we did and take pictures and send pictures with truffula trees home with kids at a birthday party. How fun!

This craft is definitely easy enough for 5 year olds to make. Some of my kids had trouble fluffing the "Truffula tuft" at the end, but they'd get the hang of it easy with a little help

Materials:
bright colors of tulle (I bought half a yard of 5 colors and it was more than enough for 20 kids)
2 pipe cleaners (the stripey ones came from JoAnn's)

Twist the pipe cleaners together.


Cut a 6x6 or 8x8 (depending on how big you want your Truffula tuft to be) square of tulle. In the picture above there are about 8 layers. This is the amount I used for my kids. For the one I made myself (in this post), I used double that-16.

While keeping layers somewhat together (it doesn't have to be perfect at all), fold it like a fan and keep it pinched.

Fold the twisted pipe cleaners around the fanned tulle.

And then twist it closed very close to the bottom of the fan.

Please don't judge my chipping nail polish!

To create the fluffy Truffula tuft, pull out the layers of tulle one by one and fluff it!
This idea is adapted from this Mother's Day Flower tutorial and Martha's Tissue Paper Pom Poms tutorial.

To make the fun picture of you holding the Truffula Tree, take a picture of you (or your child) holding a pretend tree and cut it out.

Place the tree behind your hand, and voila!

To adhere it to our door, I used a glue stick for the picture and hot glued the Truffula Tree.
Yay!
Have fun making Truffula Trees!
and remember,

Thanks for reading!
Linking to the parties on my sidebar.

330 comments:
«Oldest ‹Older 401 – 330 of 330 Newer› Newest»Post a Comment