PhotobucketPhotobucketPhotobucketPhotobucketPhotobucket

780x90

Hello! If you're new to Miss Lovie, I'd love for you to subscribe for free updates! You can subscribe by RSS feed or by email! Also be sure to follow on Facebook and Twitter for more Miss Lovie goodness!

Monday, January 27, 2014

Winter Brights Necklace

I just realized the other day that I never told you guys about this awesome necklace I made for my contributor's post for 30 Handmade Days in December!
This Winter Brights Necklace is the perfect way to brighten up your winter. I don't know about you but our winter here has been looking pretty dreary lately. Lots of snow and lots of crazy cold temps. Soooo this tropically colored necklace makes me feel like there's hope for warm weather...sometime...somewhere. Ha. 

This necklace is also pretty easy! So you should go check it out!
Photobucket

Saturday, January 25, 2014

DIY Teardrop Statement Neckace


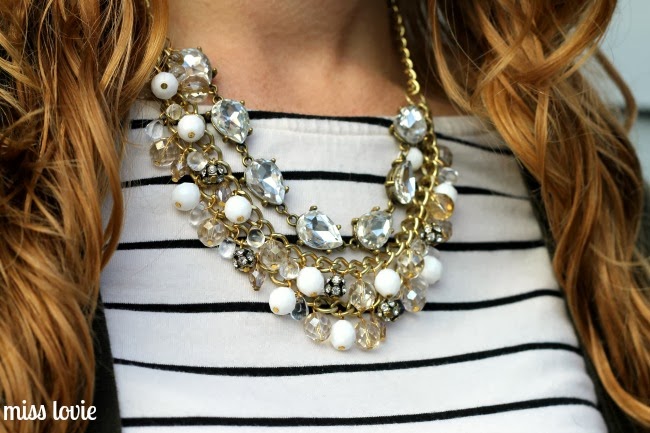
This is my new favorite necklace. Hands down. It's gold, it's white, it's kind of neutral, but it's still ultra glam. It can be dressed up or down. I finished it a week or so ago and I've probably worn it a few times already. Love it. My favorite way is to wear it over a simple top and cardi outfit to make it extra fancy.
That's me. Feeling fancy.

Let's make one. 
Gather your materials.
Materials Needed: Gemstone Chain ( I found mine at JoAnn's last summer sometime...I'm not sure if they have them still, but you could get these pretties that are similaror these, and create your own chain), mix of white faceted round beads( about 12), champagne faceted round beads (about 18), clear teardrop beads (about 16) (not pictured), some little metal rondelle beads (5 or more) (here are some similar), gold head pins, gold cable chain. Pictured are also some bead caps, but I decided not to use those.
You'll also need a lobster clasp and some jump rings- a few big and a few small. 
Jewelry Tools: flat nose pliers, bent nose pliers, round nose pliers, and wire cutters. 

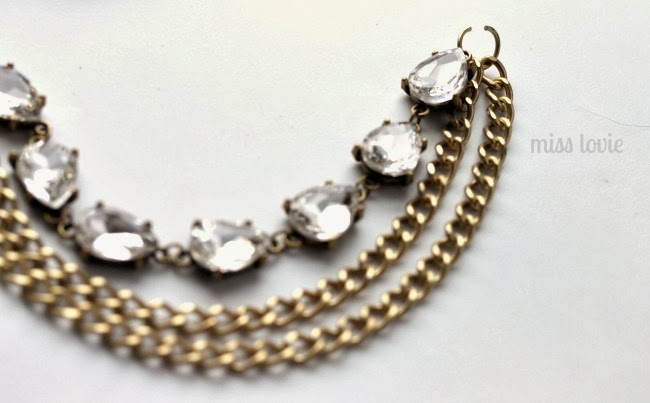
Cut your chain and create the necklace base.
My teardrop chain was about 7 inches long and I wanted the other two strands of chain to lay easily under that so I cut 2 lengths of chain 8 1/2 inches and 9 1/2 inches. I added a tiny jump ring to each end of my teardrop chain to enable it to lay correctly. If you make your own teardrop chain, you'll put a tiny jump ring between each teardrop and then put one on each end. 
Add the teardrop chain and the other two chains to a large jump ring, shortest to longest. Close the jump ring. 
Do the same with the other ends of the chains on another jump ring ensuring all chain is laying flat.

Next you'll create the chain that attaches the bottom part of the necklace to the closure. Cut length of chain at 11 inches and then cut it in half.  Use a small jump ring to attach a lobster clasp to one of the chains and attach a medium jump ring to the other. This will be your closure. You can add a small chain to that jump ring if you'd like to make the necklace more adjustable. I usually do. When you hook them together, the closure will look like this below.
Set this aside. We'll attach it later. Or you can do it now. Whatever you like.

Let's bead up the necklace. 
Create simple loops above all the beads.
Here's a reminder on how to make a simple loop if you need it...
1. Place your bead on your pin 2. Bend the wire at a 90 degree angle over the bead. 3. Place your needle nose pliers above the angled wire and bend the wire over the needle nose as seen here and in step 4 below.
4. As explained in step 3, bend the wire around the needle nose. 5. Reposition your pliers so you can continue to wrap the wire around the needle nose so that the wire creates a circle. 7. Use your wire cutters to trim off the excess wire. 

Once that's done we'll need to attach the beads to the necklace.
Before attaching beads, safety pin this portion of your necklace to something stable. I like to use this bust. It's easiest. Twist open the simple loop with the bent nose pliers, slide it around a link in the chain and then twist back closed. 
Attach the white beads evenly on both chains. Start in the middle on the top chain and work your way out. I only had 5 metal rondelle beads so I spaced those out best I could-use as many as you like! Place them in the windows of the white beads. Fill in the empty spots with the champagne beads. 
The necklace seemed like it still had empty spots and needed something different than the champagne beads. I had these tiny clear acrylic teardrop beads, but was not really sure hot to create a simple loop above them. This may not be the best way, but it's what I came up with. Slide in some wire (if you don't have extra wire laying around (I used excess wire cut from creating simple loops from long head pins- I'm a weirdo and keep this scrap wire for times like this and making my own jump rings). Then use your round nose pliers to to mold one side of the wire into a loop, then the other side. Use the round nose pliers to continue to mold the two ends together in a circle above the bead. Use the wire cutters to cut the wires directly above the point of the teardrop. Done. It goes fast, once you get the hang of it. Attach these to any holes you see to add a little more shine. 

Finally you'll attach the closure chains to either side of the bottom part of the necklace by twisting open the large jump ring and sliding on the chain and twisting the jump ring closed.

Oh, yeah.
Statement Necklace Goodness.
Hope you love it. Thanks for reading!  
I have been sharing most of my jewelry tutorials over at 30 Days blog lately, but starting next month I will be a craft contributor there instead of jewelry contributor which means I get to share more jewelry here! Get ready for more great jewelry ideas! 

I'll be sharing this necklace tutorial at my favorite link parties. 
Photobucket

Saturday, January 11, 2014

15 DIY Jewelry Organizers and Displays

I'm always on the lookout for a great way to organize my jewelry that is also beautiful. I tend to have quite a bit of jewelry and I like it and wear it more if it's displayed. Currently I'm using three huge hooks I ordered from anthropologie.com several years ago and my jewelry box I got on a trip to China. All my necklaces fit on the hooks and I wear them often since they're right there so my set up is fine. It's just not as pretty as I'd like. I decided to look around and see if I could get inspired to create something else. I found so many cool things! Hope you love these 15 Jewelry Organizers and Displays! Check it out! 
Macrame Jewelry Display by Michelle at the Whimsy Box
So creative!!
DIY Jewelry Organizer by Laurel at The North End Loft
I love the colorful backing, tiny hooks that aren't distracting, and the little dishes at the bottom are perfect.
DIY Corkboard Frame Jewelry Display by Virginia at Live Love DIY
The colors in this frame are so calming and nice. They don't distract from the jewelry. 
Jewelry Board Tutorial by Beckie at Whippycake
Um. Wowzers. Someone make me this. Please.
Shadow Box Turned Jewelry Display by Brittany at Brittany Makes 
Love love love this beautiful shadow box display. It's gold and white- my favorite always. It wouldn't fit much, but if you had a huge dresser to sit is on top of it would be so cool.
Jewelry Organizer by Liz Marie at Liz Marie Blog
I thought the different drawer pulls were cool. 
Gold Tree Jewelry Display by the Color Buzz Blog
This is really unique and the tutorial is great!
DIY Jewelry Tree by Ashee at My So Called Crafty Life
I love the vase. What an EASY make.
I LOVE the bright white frame and backing. The little tray is genius. 
Unconventional Jewelry Display Ideas by Shannon at Artemis and Apollo
Candlestick + plate. Cute. There are more really cool ideas in that post too! 

Dinosaur Ring Holder by Laura at The Band Wife
Cue the Dinosaur Jewelry Organizers! I have no idea why there are so many dinosaur jewelry organizers on the web, but there are and I think it's kinda cool and really hilarious. The gold and white makes this one very cool and the gems on the dish are fabulous.
Dinosaur Jewelry Organizer by Maria on The New York Mom
This could be a cool hook fixture for other things, too. Again, the gold caught my attention. 
Pretty Prehistoric Ring Holders by Ashlee at My So Called Crafty Life
These are crazy! The colors are so fun and again-hilarious with the dinosaurs.
Jewelry and Accessories Station by Desiree at The 36th Avenue
This peg board was well-designed and looks really functional!
DIY Jewelry Bust  by Grace at The Design Sponge
I pinned this forever ago because it's so fun. I don't have a jigsaw, but if I did, I'd make this for sure. Free template included!

I hope you enjoyed these ideas! How do you organize your jewelry? I'd love to hear about your ideas! I need some pointers. 

If your project was featured, feel free to grab a button!
Miss Lovie Creations

Thanks for reading! I hope you're enjoying your weekend!

Photobucket

Monday, January 6, 2014

Miss Lovie: 2013, A Year in Review and Goals for 2014

Today I wanted to round up a few of my favorite projects here on Miss Lovie from 2013 for you to enjoy again. 
I did create lots of jewelry for my contributor posts on 30 Handmade Days so you should definitely go check those out, too!
Here are some of my favorites!
1.Just Chains Necklace  2.Winter Brights Necklace  3. Baubles and Beadcaps Necklace 4.BHLDN Knockoff Bridal Earrings 

So somehow there are only five favorite projects from Miss Lovie. Hm. How did that happen?!
Here's a little hint.


All photography by Honey Heart Photography

Yeah. A wedding takes up a LOT of time. Especially when you have these grand ideas of a beautiful handmade wedding which you plan and do (almost) all on your own. And yes, I'll share more wedding photos soon! :)

The time I would usually spend blogging was completely taken up with wedding planning, crafting and sewing for the wedding, teaching full time, and spending time with family and friends. I spent a lot of time creating this year, but unfortunately, wasn't able to share most of it with you since it was almost all for our wedding and I wanted it to be a surprise. Lucky for you, I took pictures along the way and plan to share a few DIY wedding ideas on the blog in 2014! Woo!

So while 2013 was an incredible year for me personally (my (now) husband graduated law school, he started a new job, we moved, we planned and had a fabulous wedding, we planned and went on a perfect honeymoon, I cooked a more at home and tried to did more yoga!), it was honestly a little lackluster here on the blog. With that said, I have high hopes for 2014. 

I want to...
Create and blog on a regular basis!
Sew more, broaden my sewing skills and explore using sewing patterns. 
Learn how to make a Quilt.
Continue to make jewelry on a regular basis.
Do more home DIY projects.
Take more photos and improve my photography skills.
Clean up the blog and maybe do a redesign!

Is there anything you'd like to see more of here on Miss Lovie??? I'd love to hear what you think!

Here's to a great year!
Thank you so much for reading. I appreciate you so much. 
Photobucket
Related Posts Plugin for WordPress, Blogger...

invisible ad