


So I just finished my wreath for Valentine's Day this morning. Haha. Just in time, though, right? At least I'll be able to keep it up for awhile next year.
There aren't pictures for every step, but I'll go through them for ya. Email me if you have questions!
Materials Needed:
styrofoam heart wreath form
Frame without glass
1 skein of yarn
About 1/4 yd (or less) of felt for felt flowers (I used 3 colors)
About a 1/4 yd of cotton fabric or less for rolled fabric rosettes
Coordinating ribbon
Hot glue gun
Step 1: Wrap your Wreath Form with Yarn
Put a dot of glue on styrofoam wreath to attach your yarn then start wrapping. Wrap the yarn close to each other and overlap every now and then. Pull the yarn tight with each wrap to get best results.
The corners are tricky-try not to let it get too bulky and use SMALL dots of hot glue on the edge and around the edge of the points to keep yarn in place. I had to do it a couple times until I got it smooth and how I liked it.
Step 2: Make your Flowers
I made 3 types of flowers:

Flower #1: Felt Roses from The Purl Bee
I made these like the tutorial says on the link above except I hot-glued mine and just kinda cut the flowers and rolled center part of the rose free-handed (which makes each one different). I also added extra petals by cutting out whatever sized petal I needed and gluing it to the back of the flower in the "window" between petals. (tutorial for my method on these coming soon)

Flower #1 + Lace Trim
I used the left-over lace trim I had after wrapping the heart in lace to stick between the petals. I just added tiny dots of hot glue every now and then. The middle was already really tightly rolled so rolled the lace trim around itself a couple times and stuck it in the center. (The lace idea was a surprise. I did not plan to use it on the wreath at all so I had to get creative in adding it to the flower after it was made already. Next time I make this flower I'll add the lace as I go probably.)

Flower #2: Rolled Fabric Rosette
There are a million tutorials around craft blog-land for these. Any of them will work.
- Here's a basic one from Tatertots and Jello.
- Here's a similar one from Little Birdie Secrets
- Here's one from Lillyella that uses a technique with ironing I'd never seen before that is kinda cool.
- I LOVE this one by Trey and Lucy.
**I usually cut my strip of fabric 4 inches wide, fold in half, tie a knot at one end for the center of the flower and roll/fold the fabric around to make a flower, hot gluing as I go.
(It's kinda a mix of a few tutorials I've seen and what what works for me)
Just choose whichever method you love the best.

Flower #3 Pom Pom Flower
This awesome Pom Pom Necklace on Little Miss Momma kinda shows what I did for this flower. I used the technique, but instead of a felt circle, I used an oval, and instead of circles for the petals I used flower shapes (that I cut free-handed. They don't have to be perfect at all)
Don't you just love that necklace she made?! I need to make one immediately.
Once you have a variety of flowers, position them on your wreath and hot glue down.
Step 3: Wrap your Heart Wreath with Lace Trim

Add tiny dots of hot glue so it doesn't show through.
Step 4: Add Ribbon for Hanging

Get your frame out. (My frame came from an antique shop and cost me less than $5. Look around. You'll find something awesome.)
Measure how much ribbon you will need (depending on where you want it to hang on your door). The ribbon will loop around your frame. Hot glue it into place on the back of the frame. Then position your heart inside the frame and cut a small piece of ribbon that will connect the heart to the frame. Mine was about 6 or 8 in. long. Hot glue one end of the ribbon to the back of the heart and one end to the back of the ribbon loop you glued to the frame.
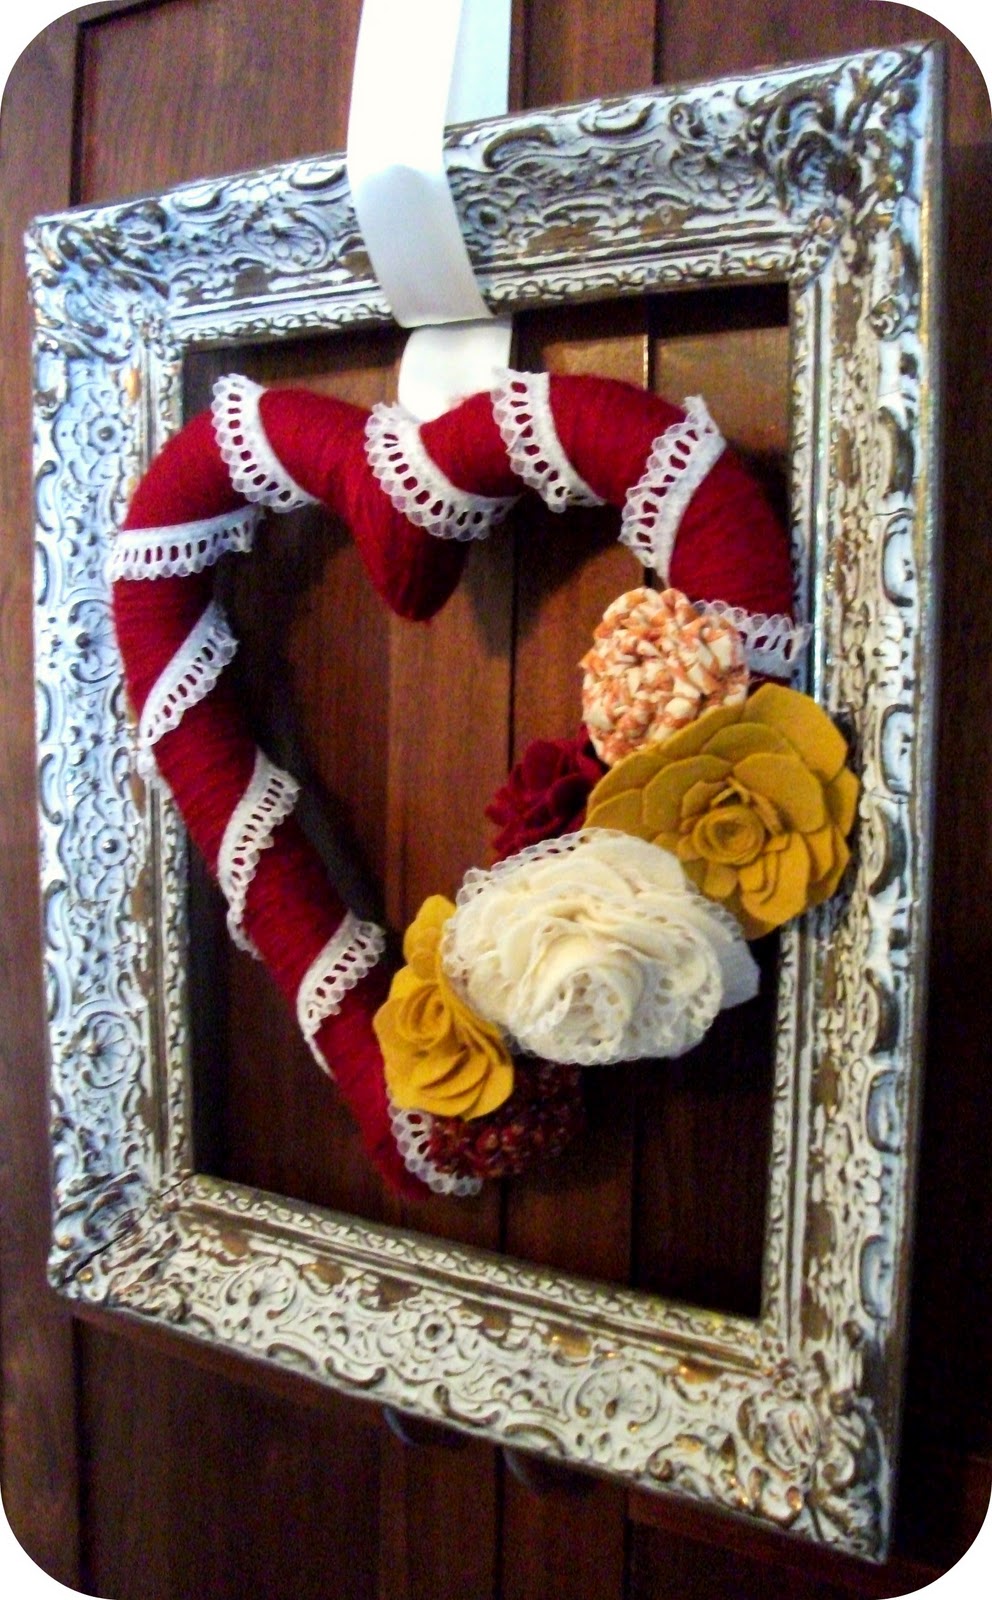
And DONE!

I really love how it turned out.
Confession: It is hanging on my corner hutch right now because my apartment door is white and I'm afraid the ivory ribbon won't look good against it...hahaha.
Annnnnnd....I'm not sure how to hang it on the door. Currently the ribbon is hot glued to the back of the corner hutch. (It'll come off easy when I want it to, but will hold for now.)
I am definitely welcoming any ideas on how to hang it on my door!! And I guess I could change the ribbon color, but I can't find a red that matches and I like the ivory. It may just stay where it is. Valentine's has almost come and gone anyway...
If I leave it inside with me I get to look at it all the time. :)
Have a great weekend, all!
Happy Valentine's Day!!!
linking to these fab partays!

My wreath got featured here! yay.

13 comments:
So, so pretty!
I love your flowers. I'm a new follower!
This is so cute! Your flowers are soo beautiful. I love your blog. I'm a new follower!
Gillian
kevinandgillian.blogspot.com
Great tutorials on the flowers and a lovely wreath. Better later than never!!!
Megan
craftycpa.blogspot.com
I LOVE this... thinking of how to adapt it for spring.
{Heather}
love2sisters.blogspot.com
Love the flowers on it, very cute! Thanks for linking up...I would love it if you added my party button so others can join in the fun :).
So very pretty! Great job!
Steph
www.luxeboulevard.blogspot.com
This is beautiful, Allie! I love that there are so many different materials included. Lots of different textures. Really nice.
What a beautiful idea. Thank you for sharing. I'm your newest follower. I'm having my first link party tomorrow (Monday). It would be great if you could stop by and post your project. http://diyhshp.blogspot.com/
I love this adorable wreath! I am featuring it over at hoo's got talent! Thanks for linking up to the party!
Lovely!
It's gorgeous and you should leave the extra leaves on next year. It looks great as is.
Have you viewed Southeast Alaska Fishing
I amazed to see this informative content, thanks for sharing this powerful content.
SalezShark CRM software Mumbai easily stores detailed information about your customers and their behaviors. It also helps with targeted marketing and product development. This CRM increases business efficiency.
Post a Comment