PhotobucketPhotobucketPhotobucketPhotobucketPhotobucket

780x90

Hello! If you're new to Miss Lovie, I'd love for you to subscribe for free updates! You can subscribe by RSS feed or by email! Also be sure to follow on Facebook and Twitter for more Miss Lovie goodness!
Showing posts with label Kindergarten Adventures. Show all posts

Tuesday, February 10, 2015

Children's Book Page Heart Valentines


Hey friends! Valentine's Day is coming up and if you're still looking for some diy valentines, be sure to check out the full tutorial on 30 Handmade Days for these Children's Book Page Heart Valentines! I can't wait to give them to the kids in my class Thursday. They are going to be so excited to see some of their favorite book characters-but even more excited when they realize there is candy inside! 
These turned out so cute and are super easy. I'd love to hear what you think! Be sure to head over for the full post!
Photobucket

Tuesday, July 29, 2014

Pete The Cat Rocking in My School Shoes Back To School Bulletin Board

As much as it pains me to say it, it's that time of year again- Back To School! Don't get me wrong.... I love teaching kindergarten. I love getting that brand new set of kiddos with unique personalities and needs, and even though it's sometimes really challenging, creating a warm and happy environment for them to learn in is my favorite thing to do, But...... But summer is just so good and I never ever want it to end! :) 

Anyway, it's inevitable that the beginning of school is coming and I know there are lots of teachers out there scrounging their brains for lots of new and exciting ideas, so I thought I'd share one of mine today. Last year I created this Pete the Cat Rocking in My School Shoes Back to School Bulletin Board (hello, mouthful) for the board outside our classroom. I am obsessed with the Pete the Cat books so it is always my ultimate goal to pass that love for this fun character to my students. It usually just takes one reading of a couple of his books to do just that. 

(If you are a parent or teacher that has been living under a rock and don't know Pete the Cat, check him out. The books are written by James Dean and Illustrated by Eric Litwin and you can download the supper catchy read aloud, songs, and videos that go with the book on the publisher's website. I have all the songs that read the book aloud on CD and use it all the time in my classroom.)


  Rocking in My School Shoes,  I Love My White Shoes,  My Four Groovy ButtonsWheels on the Bus are my beginning of the school year favorites! 

So for my back to school bulletin board I usually go with some sort of theme and put all the kids' names on it to make them feel welcome. I always let the kids take home their name as well, which they love. I am fully aware that a Pete the Cat Bulletin Board is not a super novel idea. When searching Pinterest, I found it here, here, here and here, but I still wanted to show you my process.

 Since I wanted to go with a Pete the Cat, I had to figure out how to make most of the things I needed since they don't sell Pete the Cat Bulletin Board Kits at the Parent Teacher School Supply Store (and who can afford that anyway?!). I had almost started to make my own shoes when I found the PERFECT ones at JoAnn's in their teacher section. Huge score. I don't have a really great step by step picture tutorial for you today to show you how I made the rest of the board and Pete, but I'll explain it the best I can. 

(I apologize for the low quality pictures. The lighting in our hallway is horrible!) 
Bulletin Board parts broken down: 
For the background I used fabric cut to the bulletin board size and staple gun it on. (This is BEST way to do bulletin boards, by the way. If you want to change the color, but think you might want to go back to that color later, simply staple gun a new piece of fabric on top and you can take it down later and your original one is still there. Time-saver.)
Letters: I used a mixture of punch out letters you can get at the parent teacher supply store (red lettters) and letters I made myself on Microsoft Word using a font similar to Orange Juice (yellow letters) (I couldn't find the exact font). For the yellow letters, create them in word for whatever grade level you are, print onto colored paper, laminate, cut.) 
For the Shoes: Red Shoes cards from JoAnn's
 Border: polka dot border with sparkle scallop border underneath from a parent teacher store (I love layering borders for a a big effect!)
Pete the Cat: made myself (explained below)
Music Notes: made myself (drawn onto black construction paper, laminated and cut out)
 Ok, now the best part of this bulletin board is the Pete. I'm not going to lie. This took some time. Of course, I always take forever deciding how I want to do my board so I could have definitely been making better use of my limited time right before school, but to me, this was pretty important, so whatever. :) If you want to do something like this, don't be like me- make up your mind earlier and get things done ahead of time so you can do other things you really need to do (and also get at least a little sleep before the first day of school).
 So basically for large characters, I always project the image with a document camera (we have ELMOs at our school) and trace the image onto whichever color paper is needed for each part of the character like I did here for a different character below.


I don't have pictures for how I did Pete, but I will explain it and then you can see more details in this post for my Dr. Seuss Door decoration.
So as you can see from the example above, take the color construction paper or scrapbook paper that is the base of the character, for The Cat in the Hat, it was white (and I used sparkly white scrapbook paper taped together!), but for Pete the Cat, I used navy blue. I actually used navy blue bulletin board paper for this because it was already huge and the right color. Tape the paper to the wall and trace the entire base of the character with a permanent marker. I just traced Pete's body, including the backpack, the red body of the guitar, and his legs onto the blue paper, not the white part of the guitar, shoes, or whiskers. These parts can be glued on later. Be sure to add in all the details as you trace on the parts that will be that color. For Pete, I didn't need to trace the details of the backpack, guitar or face because I would be gluing on different colors for those items. Then take the base down and set aside. 

Then tape the color for the next item, his back pack- so I used orange construction paper and traced it with permanent marker, cut out all the parts, and then glued it with elmer's stick glue on top of the blue base of Pete. See below for how I did it on Cat in the Hat. The process is the same. 
Continue this process with all parts of Pete. I did use the sparkly red and white scrapbook paper for Pete's guitar and shoes to add more pizazz :) Be sure to add plenty of detail on the white parts on the guitar and shoes with your permanent marker to make it look realistic. Glue all the parts where they go onto the Pete base. For the whiskers, just trace and cut out curved lines from black construction paper and glue the ends to Pete's face. Then run it through the laminator to make sure all parts stay together nicely and you can use it again! Be sure that all your parts are glued on sufficiently so they don't slide during lamination like one of Pete's shoes did!! I did leave the white arm of the guitar off when I laminated Pete and laminated it separately since it since it wouldn't all fit through the laminator. Then I taped it on with clear tape- no big deal. Cut out the laminate around Pete and you're done! 
Whew. I told you it was a little time consuming, but to me, well-worth it! I'd love to hear about your Back to School Bulletin Board this year! Leave any links in the comments and I'll come check you out!

Happy Back to School, everyone!  
Photobucket

Tuesday, February 25, 2014

Dr. Seuss Door Decoration: I Can Read With My Eyes Shut

Every year on Read Across America Day the Kindergarten, first and second grade classrooms at my school have a Dr. Seuss Door Decorating Contest to celebrate Dr. Seuss' birthday and encourage reading! It is definitely one of my favorite times of the school year. I know a lot of teachers celebrate Read Across America Day so I thought I'd share our door from last year featuring the book, "I Can Read With My Eyes Shut" by Dr. Seuss. 
I love this book! It really encourages kids to read by telling them about all the great things they can learn about and the illustrations (as usual with Dr. Seuss books) are great. 
"There are so many things you can learn about. BUT...you'll mss the best things if you keep your eyes shut." "The more that you read, the more things you will know, the more that you learn, the more places you'll go!" 
"If you read with your eyes shut, you'll likely find that the places you're going is far, far, behind...SO....that's why I tell you to keep your eyes wide. Keep them wide open...at least on one side."
We used the above Dr. Seuss quote from the book. It's a popular quote, but I love it. 
The kids and me are holding our own "books" they made themselves. I took pictures of them with funny glasses made from pipe cleaners on (that they also made) and then we colored and glued on some  Cat in the Hat bows and hats. So fun. 
Then I used the last quote from the book as well. I just love those cats winking at each other. Favorite part of the book.

Here's our full door. If you're curious about how to make the cute little books and the characters at the bottom, read on! 

Let's make the characters first. 
Use an overhead projector/document camera to project the picture you want to use from the book on the wall. 
Then, tape some paper the same color as the character (I used some fancy sparkly scrapbook paper) on the wall and trace with a marker-one that won't smear. Be sure to trace all the sketchy parts! 
Now we've got a cat! 
For any other parts of the pictures that are different colors, tape the different color papers on the wall and trace the parts that are that color. Fort he red, I traced the bows and stripes of the hat. Then cut them out and glue them on top of the character. Continue until all parts are complete! 

Ok, now let's make the kid pictures and their books. 
First you'll need to help your kids make some fun pipe cleaner glasses, and then take pictures of them and cut the pictures out like shown below

For each student they'll need a little book cover cut from some fun scrapbook paper and some little "hands". I just hand drew these to match the size of the photos. Easy. 
Your little book covers should look like this. 
If you want to have some fun, staple in some folded white paper and have your kids write their own books. 
This makes the books look a little more like a book, too. 
Staple the books to the pictures of the kids by pinching the books up and stapling the book to each side. 
And done. 

Add a Cat in the Hat bow and hat and you've got some cute "cat" kinders reading!

These would make great decorations or crafts for a Cat in the Hat or Dr. Seuss party, too, if you don't work at a school! 


Hope you enjoyed this post! If you're looking for more Dr. Seuss Door Decorations or crafts, you should check out my doors from the past couple of years, 

Happy Birthday, Dr. Seuss! 
I'll try to share what we do for this year soon. First I've got to figure out what we're doing.... Ha. 
Photobucket

Saturday, September 1, 2012

Favorite Books and Crafts - With Free Templates!

I've got a super fun project to show you today for the Back to School Event!
 The past couple of weeks have been our first weeks of Kindergarten. We've been working hard on how to follow the rules and learn school procedures, learn our names, and have been getting to know each other. One of the things I love to do those first few weeks is share my favorite books with my Kindergarten students and then let them make something that they can take home to help them remember what we read together. Making some sort of craft after reading a story can really bring that story to life for lots of kids. 

Even if you don't have a classroom, these are SO easy to do at home with your kids, too! I created all the templates for these usually the morning right before school so they are nowhere close to perfect, but they work fine for kids' crafts. Please use them for your own personal use. 
First up:
Chicka Chicka Boom Boom Craft
 There can't be a person in this world who doesn't love Chicka Chicka Boom Boom by Bill Martin Jr. and John Archambault. It's a Kindergarten staple and we read it in my classroom so many times my kids memorize it. You can also get this book on DVD, too. The "movie" is precious.

Since we've been working a lot on our names, I wanted to add in practice on that skill to this craft. 
 I have actually seen this saying at the bottom on some other teacher blogs, but I couldn't find a document for it so I just wrote one up really quick. There is a his and hers version.
(If someone finds one or if you are the original creator of this idea, let me know, and I'll link back to you!)

For this craft, the only extra thing you would need is your child's name cut out in pieces so they can place it in order and glue it on the leaves. 

For all crafts like these, I simply copy the templates onto construction paper on our copier at school, but if you are doing these at home, you could always print the templates on card stock and trace them onto the correct colors and then let kids cut them out. 
 If you have not read this book, go do that immediately. So sweet. 
Want some more activities to go along with this book?
Create some fun Felt Board pieces to retell the story and sew a Travel Felt Board!
Don't Let the Pigeon Drive the Bus Craft

Don't Let the Pigeon Drive the Bus (and the rest of the "Pigeon books") by Mo Willems have got to be some of my favorite books. They are SO funny and the kids get to interact with the stories which make them even more involved in the story when it is read to them. 

For this craft, the students have to draw on the wing, the legs, and the eyeball (black circle) with a black crayon or marker. 
 Illustrators amaze me. 
Again this book was made into a DVD. Hilarious.
Watch it here. 
If You Take a Mouse To School Craft
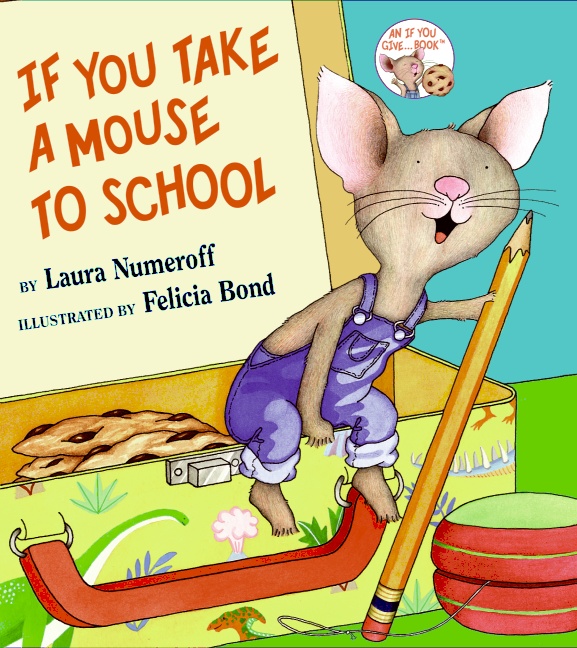
We read If you Give a Mouse a Cookie and If You Take a Mouse to School by Laura Numeroff and then made this super easy mouse craft. 
The only extra thing the kids have to do for this craft is draw on the whiskers with a black marker or crayon. 

Wheels on the Bus School Bus Craft
Bus template adapted from here
I found this sweet little board book: The Wheels on the Bus by David Ellwand at our local discount store, Ollies (my favorite stop for the BEST cheap children's books) and it is SO cute. 

So cute. They loved singing with it. I love all books that you can sing, too. If you look on the right side of this book it has a little speaker that plays the melody of the song when you push it. The room never got so quiet when I get ready to push that button. Ha. 

As you can see in the picture of the craft above, there are cats drawn in the window. We also read Pete the Cat: Rocking in my School Shoes this day and tied both books to our craft. If you just read Wheels on the Bus  or sing it and just want to make the bus craft, you obviously don't need to draw the cats. We also added a the front grill/bumper lines, front and back lights, and stop signs (all the kids' ideas).
Pete the Cat School Bus Craft
 Bus Craft Template
Bus template adapted from here
Pete the Cat: Rocking in my School Shoes by Eric Litwin and James Dean is one of my new favorite stories. The rest of the Pete the Cat books are equally precious. I can't wait to share these stories with my class. This book is already a class favorite. 
 We may have read it almost every day since school has started. :)

I hope you've enjoyed these books as much as I have and will enjoy the templates to make the crafts. I hope you're inspired to create with your kids as you immerse them in great literature. 
Go see the rest of the Back to School projects here!
Go link up YOUR Back to School or school-themed projects here
Photobucket
Related Posts Plugin for WordPress, Blogger...

invisible ad