PhotobucketPhotobucketPhotobucketPhotobucketPhotobucket

780x90

Hello! If you're new to Miss Lovie, I'd love for you to subscribe for free updates! You can subscribe by RSS feed or by email! Also be sure to follow on Facebook and Twitter for more Miss Lovie goodness!
Showing posts with label Kids Crafts. Show all posts

Saturday, September 1, 2012

Favorite Books and Crafts - With Free Templates!

I've got a super fun project to show you today for the Back to School Event!
 The past couple of weeks have been our first weeks of Kindergarten. We've been working hard on how to follow the rules and learn school procedures, learn our names, and have been getting to know each other. One of the things I love to do those first few weeks is share my favorite books with my Kindergarten students and then let them make something that they can take home to help them remember what we read together. Making some sort of craft after reading a story can really bring that story to life for lots of kids. 

Even if you don't have a classroom, these are SO easy to do at home with your kids, too! I created all the templates for these usually the morning right before school so they are nowhere close to perfect, but they work fine for kids' crafts. Please use them for your own personal use. 
First up:
Chicka Chicka Boom Boom Craft
 There can't be a person in this world who doesn't love Chicka Chicka Boom Boom by Bill Martin Jr. and John Archambault. It's a Kindergarten staple and we read it in my classroom so many times my kids memorize it. You can also get this book on DVD, too. The "movie" is precious.

Since we've been working a lot on our names, I wanted to add in practice on that skill to this craft. 
 I have actually seen this saying at the bottom on some other teacher blogs, but I couldn't find a document for it so I just wrote one up really quick. There is a his and hers version.
(If someone finds one or if you are the original creator of this idea, let me know, and I'll link back to you!)

For this craft, the only extra thing you would need is your child's name cut out in pieces so they can place it in order and glue it on the leaves. 

For all crafts like these, I simply copy the templates onto construction paper on our copier at school, but if you are doing these at home, you could always print the templates on card stock and trace them onto the correct colors and then let kids cut them out. 
 If you have not read this book, go do that immediately. So sweet. 
Want some more activities to go along with this book?
Create some fun Felt Board pieces to retell the story and sew a Travel Felt Board!
Don't Let the Pigeon Drive the Bus Craft

Don't Let the Pigeon Drive the Bus (and the rest of the "Pigeon books") by Mo Willems have got to be some of my favorite books. They are SO funny and the kids get to interact with the stories which make them even more involved in the story when it is read to them. 

For this craft, the students have to draw on the wing, the legs, and the eyeball (black circle) with a black crayon or marker. 
 Illustrators amaze me. 
Again this book was made into a DVD. Hilarious.
Watch it here. 
If You Take a Mouse To School Craft
We read If you Give a Mouse a Cookie and If You Take a Mouse to School by Laura Numeroff and then made this super easy mouse craft. 
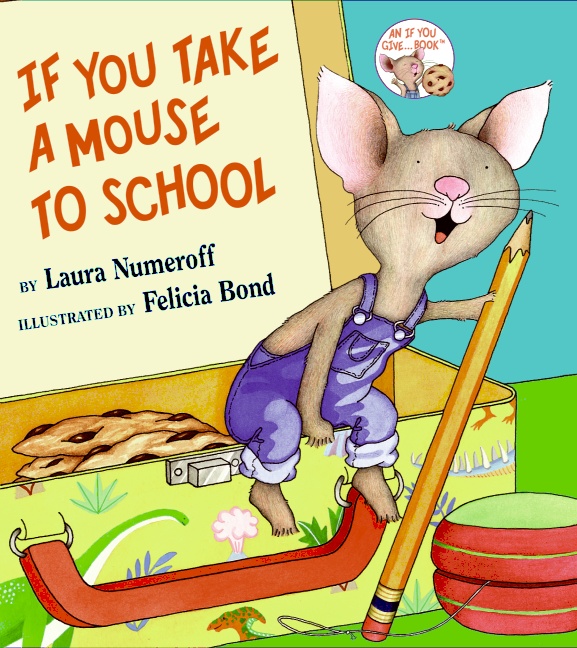
The only extra thing the kids have to do for this craft is draw on the whiskers with a black marker or crayon. 

Wheels on the Bus School Bus Craft
Bus template adapted from here
I found this sweet little board book: The Wheels on the Bus by David Ellwand at our local discount store, Ollies (my favorite stop for the BEST cheap children's books) and it is SO cute. 

So cute. They loved singing with it. I love all books that you can sing, too. If you look on the right side of this book it has a little speaker that plays the melody of the song when you push it. The room never got so quiet when I get ready to push that button. Ha. 

As you can see in the picture of the craft above, there are cats drawn in the window. We also read Pete the Cat: Rocking in my School Shoes this day and tied both books to our craft. If you just read Wheels on the Bus  or sing it and just want to make the bus craft, you obviously don't need to draw the cats. We also added a the front grill/bumper lines, front and back lights, and stop signs (all the kids' ideas).
Pete the Cat School Bus Craft
 Bus Craft Template
Bus template adapted from here
Pete the Cat: Rocking in my School Shoes by Eric Litwin and James Dean is one of my new favorite stories. The rest of the Pete the Cat books are equally precious. I can't wait to share these stories with my class. This book is already a class favorite. 
 We may have read it almost every day since school has started. :)

I hope you've enjoyed these books as much as I have and will enjoy the templates to make the crafts. I hope you're inspired to create with your kids as you immerse them in great literature. 
Go see the rest of the Back to School projects here!
Go link up YOUR Back to School or school-themed projects here
Photobucket

Sunday, April 15, 2012

Stained Glass Flower Kids Craft {Tutorial}

 A Tutorial! Yay! It's about time, right?
Stained glass flower crafts are so classic. I love them. I had never done any with my students before and the day before spring break I determined that it was high time. I got the idea and most of the directions for these at DTLK crafts, but I made my own templates and added some things. :)
They really do look so pretty in our classroom window. Wanna make some in your classroom? Or with your kids at home? Let's do it. After I modeled it for them, my kindergarteners did all parts of this activity except the actual ironing.
Gather Materials:
Flower Template
Construction Paper
Crayons
Crayon Sharpeners
Scissors
Old Towel
Wax Paper, about a 12x12 sheet per flower.
Iron
 1. Copy the flower and stem template onto the appropriate color construction paper. Fold template in half and make a cut in the middle. (This template is not symmetrical so you cant keep it folded and cut and then unfold). 2. Unfold the template, stick scissors inside the cut and cut the flower out from the inside. This was a little difficult for some of my kiddos, but I had extras on hand. :) 3. Cut out the stem and glue it to the flower. 
1. Sharpen crayons to get a good amount of shavings. You can use different coordinating colors if you like. 2. You probably shouldn't let children shave the crayons, but if you're trying to help them out, this way might be faster for you. 3. Lay a towel down and the wax paper on top. Dump the shavings out onto the wax paper 4. and spread them out. 
 1. Fold the wax paper over itself, completely covering the shavings and leaving a couple of inches between any edges to insure the melted crayon doesn't seep out. 2. Cover the folded wax paper with the towel. Be sure you use an old towel just in case any of the shavings spill out and it gets on the towel. You can tell in the picture that after doing about 20 of these, this did happen to me. Hold the iron over top of each area for several seconds. It will seem like nothing ins happening for awhile and then everything will be melted at once so watch it. The iron should be on a medium to low setting.
And this is what you get! Pretty!
1. Position the flower cut out over the part of the melted crayon you like the best. 2. Glue it down. 3. Cut off any excess wax paper around the construction paper. 
 Ta-Da! 
Just for fun I made some grasses to go under the flowers to make it look like a little spring garden. :) These are optional, of course.
 These are, of course, my students' creations. 

 Cute, huh? Even the most odd color combos came out great! You really can't go wrong with this project.


Now I think it's time to get out some sweet little springtime books so we can learn more about what Spring can bring! 

Thanks for reading!
Linking to the parties on my sidebar.
Photobucket

Friday, March 2, 2012

Truffula Tree Kids Craft Tutorial and The Lorax Door Reveal!

Happy Birthday, Dr. Seuss! 
In this post you will find my Dr. Seuss classroom door decorations and a tutorial on a cute little Truffula Tree craft for kids! 
So I really really really love The Lorax book. 
It's such a great story. I was so surprised by how many people I've heard lately say they've never read it, too. Go read it! I am SO pumped for the movie to come out. I'm hoping to go see it soon! No, I don't have kids. Yes, I love animated movies. What?

When my hall at school decided to do a door decorating contest for Dr. Seuss' birthday I knew what book I had to do. the kids are actually supposed to pick their favorite....but, well, I kind of picked mine. Sorry kids. I knew they'd love my idea, though and since the movie was coming out, I thought they'd be at least a little more familiar with The Lorax, at least.  

So here's our door. The final product. :) 
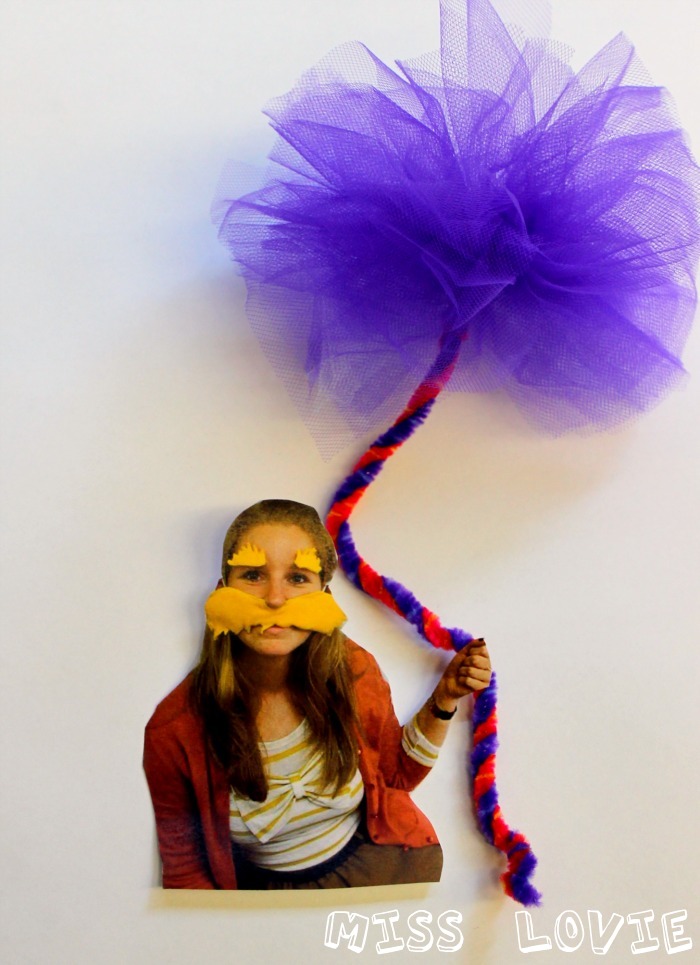
I'm kind of in love. It's hard to see (1. because it's hard to take pictures of an entire door, and 2. I don't have permission to show you the kids' faces anyway) but the pictures are of all my students with a Lorax mustache and eyebrows I made, cut out, holding their own Truffula Tree they made. 

Here's a close up of me on the door with my Truffula Tree
Keep reading! At the bottom of this post is a tutorial on how to make your own cut out and Truffula Tree! 
So the kids' pictures are way cuter than mine. One of my kids could totally pass as the Lorax. Hilarious.
We are all sporting this fabulous mustache and eyebrows. I found this tutorial and whipped it up the morning before school the day we took all the pictures. Instead of using a stick to hold up the mustache I used elastic. I figured this would be easier for the kids. Especially since they had to hold their imaginary tree in the photoshoot. 
I made the eyebrows for fun too. I made both eyebrows and mustache using no-pill felt (on sale!) the same way the tutorial says except I placed some card stock in between the two layers when sewing so the mustache and eyebrows would have more stability. I just used regular tape to attach the eyebrows. We just needed them to stick for the picture so it worked fine.  
I just love that Lorax guy. :) 
I traced both the Lorax and Onceler below using a projector with a black magic marker on construction paper. Then I cut them out and glued them in their spots on the door. I simply backed our Lorax friend with a strip of cardboard so he would stand up and pop out of the Truffula Tree. 
 The Onceler's window is actually purple like it is in the book. Not sure why it's showing up pink here.
I free handed the large Truffula Tree, and free-cut the letters of "The Lorax". The 3rd and 4th graders voted and we'll find out next Friday who won the contest! I'll keep you updated!
I hope you love it as much as I do! 

Click on over to my teacher friend's kindergarten blog, Ketchen's Kindergarten, to see more Dr. Seuss Door ideas! 
Now. Want to make your own little Truffula Tree? 
I know Dr. Seuss' birthday is over, but this would make a fun craft at a Dr. Seuss themed birthday party or just a fun craft after you go see the movie! 

If you wanted to get really crazy, you could make the Lorax mask and eyebrows like we did and take pictures and send pictures with truffula trees home with kids at a birthday party. How fun! 
 This craft is definitely easy enough for 5 year olds to make. Some of my kids had trouble fluffing the "Truffula tuft" at the end, but they'd get the hang of it easy with a little help
 Materials:
bright colors of tulle (I bought half a yard of 5 colors and it was more than enough for 20 kids)
2 pipe cleaners (the stripey ones came from JoAnn's)
Twist the pipe cleaners together.  

 Cut a 6x6 or 8x8 (depending on  how big you want your Truffula tuft to be) square of tulle. In the picture above there are about 8 layers. This is the amount I used for my kids. For the one I made myself (in this post), I used double that-16.
 While keeping layers somewhat together (it doesn't have to be perfect at all), fold it like a fan and keep it pinched. 
Fold the twisted pipe cleaners around the fanned tulle.  
 And then twist it closed very close to the bottom of the fan. 
 Please don't judge my chipping nail polish! 
 To create the fluffy Truffula tuft, pull out the layers of tulle one by one and fluff it! 
 To make the fun picture of you holding the Truffula Tree, take a picture of you (or your child) holding a pretend tree and cut it out. 

 Place the tree behind your hand, and voila! 
 To adhere it to our door, I used a glue stick for the picture and hot glued the Truffula Tree. 

Yay! 

Have fun making Truffula Trees! 
and remember, 
Thanks for reading! 

Linking to the parties on my sidebar.
Photobucket
Related Posts Plugin for WordPress, Blogger...

invisible ad