Hello! If you're new to Miss Lovie, I'd love for you to subscribe for free updates! You can subscribe by RSS feed or by email! Also be sure to follow on Facebook and Twitter for more Miss Lovie goodness!
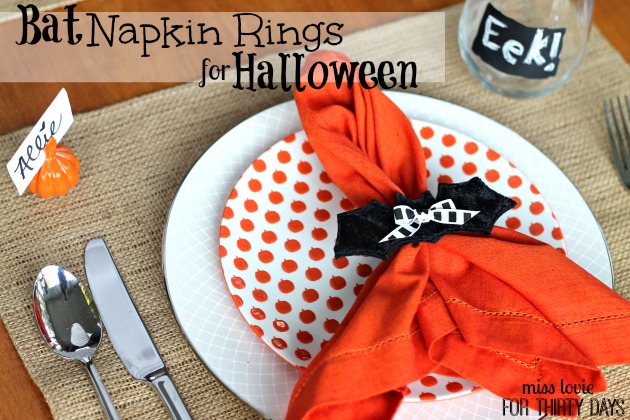
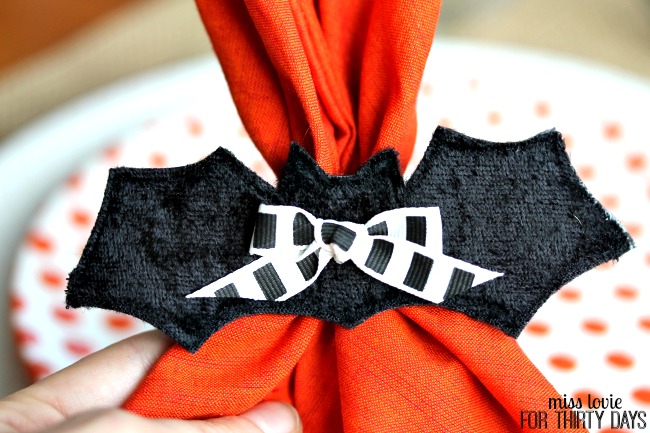
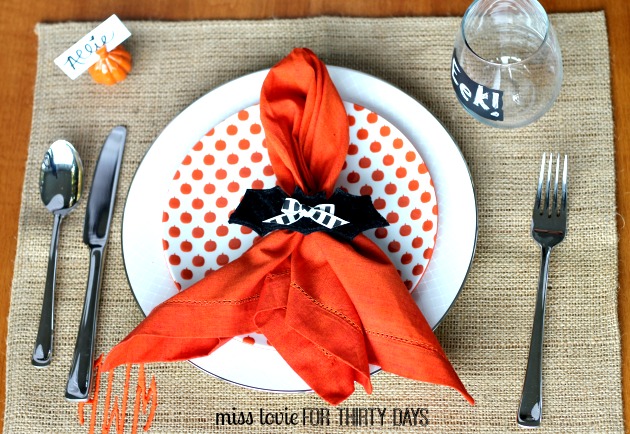
Hello, friends! I am so excited to finally share these Easy Bat Napkin Rings with you today! You should definitely go check out the tutorial out at 30 Days! When my friend sent me these pumpkin plates from Crate and Barrel as a gift, I just knew I needed to go finish the dining room table off with a little more spookiness for Halloween. These bat napkin rings were the perfect touch.
Oh my gosh. You guys. I've been dying to share this project with you for weeks. This Spooky Skull Halloween Wreath is probably one of my most favorite projects I've made in a long time! I love the colors, the glitter, the stripes, and the spooky, of course.
So much glittery Halloween-y goodness.
If you want more pictures of this wreath and instructions on how to make it, go check out my tutorial on Thirty Handmade Days!!
Happy Halloween!!I hope you and your family are having a great time Trick or Treating and celebrating my favorite holiday!
This was one of the most fun costumes we've done.
I got the idea from Julie Ann Art, the blog. She has a tutorial on her blog on how to make the tooth. While it seems easy, it is incredibly awkward to sew. Her instructions are great, it was just awkward. I got through it and I really don't want to throw the huge thing away because I spent a long time on it. Anyone need a giant tooth costume??!
I loved this idea because I got to make a fun tutu. And the wand was ridiculously fun to make, too. I'm not a "princess"-type, but making and wearing that tutu were really fun. My friends got a kick out of me wearing a tiara. I don't think it has ever happened before and probably won't again.
I also made the collar necklace. I never intended on using it afterward, but now I kinda love it. Ha. I wasn't sure about that trend until I wore it. I'm going to try to do a tutorial on it soon. :) I'll probably do one on the wand, too. I want to make more to use as pointers in my classroom.
My friends had some pretty awesome costumes, too! A lady bug, a tooth fairy, a fox, a stylish Native American, and a pirate are obvious friends.
Well here it is. Not that anybody's banging down my door to get this tutorial or anything, but I thought I'd put it out there in case there are some other Star Wars nerds (besides Mr. Lovie and me) that have been dying to know how to make R2D2 and C3PO costumes.
I am not promising loads of pictures for this tutorial because I was making the costumes in such a hurried frenzy, that I forgot or didn't have time to take decent pictures of what I was doing in every step. I think I can explain it well enough in words with the few pictures I have and give you the links I used as well. :)
Below you will find the picture that sold us on the idea of being the droids from the beloved Star Wars films.
How funny right?! As soon as we saw it, Matt said, "Oh, it's on." I love that they went with the less obvious choice of having the male as R2 and the female as 3PO. And their baby is cute as Leia. I'm sure our dog, Nix, would have made a great Leia, too, but Darth Vador was much funnier.
papier mache materials (flour and water or glue and water)
newspaper
acrylic paint
duct tape
For R2D2's costume and for the helmets, I got my inspiration from this awesome R2D2 tutorial on Instructables. I made the helmets just like she instructs in the tutorial. I used Recipe Option 2 from here for the papier mache and let it dry for 48 hours, I believe. You could use a hair drier (set on cool) to dry it if you needed it quicker. Pop the balloons to get the helmet shape. Paint the helmet with 2 coats of acrylic paint. For extra stability, place duct tape on the inside vertically and horizontally (as seen in the picture below) for added support. This is optional and may even be unnecessary, but I did it just in case.
Matt's helmet was too big (mostly because he made me make it bigger because he was afraid it wouldn't fit) so he improvised to make it fit by duct taping several squares of craft foam stacked on top of each other inside on the sides and front and back. See above.
So if your helmet is too big, no worries, you can still make it fit. I did not do this to mine, but it was still loose so it moved around a lot during the night, but it wasn't bothersome really.
R2D2 Costume Tutorial
Materials Needed:
1 1/2 yds of white pleather, vinyl or any shiny material
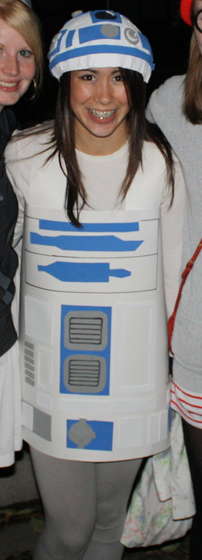
We followed her tutorial for the general idea of basically making a tube dress with straps and adding the R2 hardware by gluing on cut out foam pieces, but instead of using poster board, I sewed a tube dress out of the white pleather (that's always on super sale around Halloween!!). I loved her outfit, but she couldn't sit in it I'm sure! And what if it rained?! So I went with a more all-weather, more comfortable option.
Make the tube "dress".
Cut a rectangle out of the white pleather after taking measurements. Take measurements: Find the widest part of the person that will wear the costume (around the chest or the hips) and take that measurement and add on 5-7 inches-this will be the width of your rectangle. Adding on the extra inches will allow for wiggle room and give you the ability to sit down. Then measure how long you want it to be. Start at where the top of the "dress" would hit and measure to a few inches above the knee. Add about 2 inches to both length and width measurements for seam allowance. Matt is about 6'3" and usually wears a size large.
His measurements were 42" across the chest so his width was 42+7+2=51 inches wide. I measured 30" for the length of the "dress" so 30 +2= 32 in. long
I cut a 51x31 piece of pleather.
Hem top and bottom of rectangle and sew right sides together to get the tube dress.
Then sew the straps.
Cut 2 strips 4 inches wide. The length should be the measurements from the top of the tube "dress" in the front, over the shoulder, and to the top of the tube "dress" in the back. I don't even know what the actual measurement was for this one. I simply made matt put the "dress" on and pinned where each strap should hit in the front and back and used that as my measurements.
Fold each side of the strip over about 1/4 an inch and sew down.
Then fold the strip over so that wrong sides are facing each other (and iron if you're being precise, or don't like me :) ) and sew along the seams you made already along the edge.
Top stitch along the other side.
Sew the straps to the front and back of the "dress" along the seams already made when hemming the "dress".
The tube "dress" is done!
Glue on foam pieces.
Now you just have to cut out the foam to look like the hardware on R2's body. I have to admit Matt did this part because we made these the night before our party and I was running out of time. He did such a great job. Lay the pieces out on the tube "dress" and then hot glue each piece on. Do the same with the painted helmet.
C3PO Costume Tutorial
Materials Needed
2 yds. (just to be safe) of gold pleather
1/4 yd. of black pleather
1/2 inch wide elastic
(enough to go around your hips for shorts and around your natural waist for top)
(I found mine in each color I needed at Michael's and didn't have to buy a set)
gold trim (about 4 yds.)
sewing essentials
a well-fitting t-shirt
a well-fitting pair of shorts
Other items for the costume not created by me:
gold glasses
gold leggings
gold flats
Let's just make it very clear that I did NOT know what I was doing while making this costume. I definitely figured it out as I went. I tried about a million options and found this option on accident and I think it worked better than any of my other ideas. I made the shorts and the top by creating my own patterns. If you already have patterns for shorts and a top, use them, but if you have to create your own, isn't as scary as it seems. I used this post on Shwin and Shwin about drafting your own pattern.
Make the shorts:
Draft your pattern for the shorts from the well-fitting pair of shorts you have.
Use this video as a guide:
I did not hem the bottoms of my shorts because the material I was using wouldn't fray very much.
Make the top.
For the top, I used a t-shirt to draft my pattern, but I made a few changes to it. I made it a little larger (on accident, but I'm glad I did and you should do it on purpose). Maybe add 2 inches onto the edge of your pattern (not on the fold part) depending on how large the shirt you're using to make your pattern is already. Make sure the head hole is big enough to go over your head!! Unless you want to put a zipper or buttons down the top of the back of your shirt. Also be sure it is a little longer than a normal t-shirt (more like a tunic) to cover the top of the shorts fully.
When tracing the shoulder part of the t-shirt on your pattern, curve the shoulder down and made it about an inch longer than it was supposed to be. This created the tunic type shoulder that came out past my shoulder. I did not make sleeves since the shoulder came out like that. See above picture for curved shoulder.
I didn't hem anything except the front neckline and the top of the back of the shirt I sewed hot glued gold trim around the sleeves and the neckline (hot glue because I ran out of time and did it right before the party and did not have a sewing machine with me) so a hem wasn't necessary and the belt covered the bottom edge of the shirt so a hem wasn't completely necessary there either. If you're into precision or making sure your costume lasts longer, you might want to hem everything.
For the cinched waist, I sewed elastic to the inside of the top.
Measure your natural waist and add an inch. Cut a piece of 1/2 inch wide elastic to fit around your waist, then sew the ends together, creating a circle. Pin it to your top in 4 places and stretch the elastic as you sew so that it lays flat against the fabric from one pin to the other.
Cut a rectangle 6 inches wide and the same length around the bottom of your top is plus 1 inch for seam allowance. Then pin on the plastic lacing in a zig zag pattern. Let the lacing curl naturally as you go as pictured above.
Keep pinning on one color at a time.
I used red, blue, white, and gold lacing. The more you pin the more the belt will curl. The lacing may come unpinned. Don't panic- this is not a meticulous process. Just pin it back where you think it goes and move on.
Remove pins as you sew down the lacing. As you can see above, the lacing creates a loop that you sew over. Sometimes my machine still did not like sewing through the plastic even if it was laying super flat, so I would put the presser foot up and turn the wheel a couple times to get the needle to go over the plastic.
Fold the side over 1/4 an inch and sew down once. Don't worry about the loops of lacing coming out. You can't control C3PO's loose wires. :) It'll look fine once it's sewed to the top. Do this on both sides of the belt.
Sew right sides together (I made my belt too long so that's why the seam allowance is so long. Your seam allowance should be 1/2 inch.)
Pin the belt to the bottom of the top and sew along the hem and along the the top of the belt.
Glue on the gold trim.
Finally, for the circles, simply place some pins in a circle with about an 8 inch diameter right above the belt. I used a large spool of twine as my pattern and placed pins around it and then glued down the gold trim and removed pins as I glued. For each circle, I used 3 circles of trim side by side (but this depends on the width of your trim). For the second and third circles inside the largest circle, use the largest circle as a guide and created a new circle inside it. For the smallest circle in the center, glue the trim in a spiral until it meets the middle (mine ended up being about 3 circles of trim side by side) and fold the end of the trim under itself and glue it down.
DONE!
I hope you enjoyed the tutorial(s)!
If you want to see more of these droids in action at our Halloween party along with some other fun guests and Halloween decor, go to this post.
Please let me know if you make either one of these! I'd love to see it!!
As you can see, we did! Above you will find one of my reasons for not posting this past week:
Miss Lovie as C3PO(all made by me, minus the glasses, leggings, and shoes), Mr. Lovie as R2D2(all made by me AND Mr. Lovie!!), and Nix as Darth Vador (altered by me because apparently medium sized dogs have legs that are 2 feet long). These costumes (and school and everything else) have robbed me of all possible free time. So worth it, though.
Droid Love 2011.
And, of course, Nix was evil all night.
"There is no escape. Don't make me destroy you."
"You don't know the power of the dark side!"
"I find your lack of faith disturbing"
(Side note: Since I got a new camera, I have amazingly been able to take pictures of our sweet, I mean evil, doggie Nix because she doesn't know it's a camera. Usually she is so scared of cameras that she runs out of the room, tucking her tail. And that means little cameras, big cameras, camera phones, etc. You could point a remote at her and act like you're taking a picture and she'd be outta there. But for some reason now that I have a huge, ominous, black, real-looking camera, she's cool with it. Weird. )
As I'm sure you have figured out by now,
I love Halloween.
Every year, I gather my bestest friends for a Halloween party and it just gets better every year. We've been doing this for 3 or so years now and I have accumulated 2 or 3 large tubs' worth of decorations (which, of course, don't include the pumpkins I usually glitter and carve). I always enjoy adding to the ridiculous collection of decor every year, but this year was a different kind of year because I made our costumes.
This took up the majority of my Halloween crafting time so not much time was able to be spent on new decorations, but it was so worth it. Don't you think? (Stay tuned for a brief how-to on both the C3PO and R2D2 costumes)
And of course, our costumes were great, but there were so many other amazing characters at our party. I love my friends and their creative abilities. :) I couldn't help but share a few pictures.
An Amish "Father and Son"
A mime who refused to perform...
A sweet jack-o-lantern who was kind enough to host the party (oh yeah, and be a great best friend).
The Ringmaster, his Lead Performer and their Elephant...
Of course, The Great Barrier Reef! Their shirts and pants look tie dyed. :)
And many more not caught on film.
And these two were spookier than words. Somehow they were everywhere at once.
The lady ghost cursed this conversation of the circus performer and Mrs. Peacock (who was undoubtedly planning the circus performer's murder...it was Mrs. Peacock in the foyer with the knife....)
She snuck up on a football game...
She sometimes posed for photos with her best friends, but only spookily.
Then her other ghostly half of a husband snuck into pictures as well. Oh and there's the Riddler!
But he's best known as the ghost from up above. The Ringmaster could not believe his eyes.
"I'll get you."
The lady ghost loved dancing with the mime.
And he got caught ghost planking.
Needless to say, fun was had by all.
Know what the coolest part is? Hardly any of us live in the same place anymore and lots of us travelled to get to where we all know each other from, Lexington, Kentucky. We traveled from Georgetown, Kentucky, Louisville, Kentucky, Paducah, Kentucky, Atlanta, Georgia, Dayton, Ohio, etc. Travelling 2-6 hours for Halloween is dedication. I'm thankful that this crazy holiday is able to bring us all together.
Batty Table Runner seen here, a mummy, some fun printables and pictures from previous Halloweens
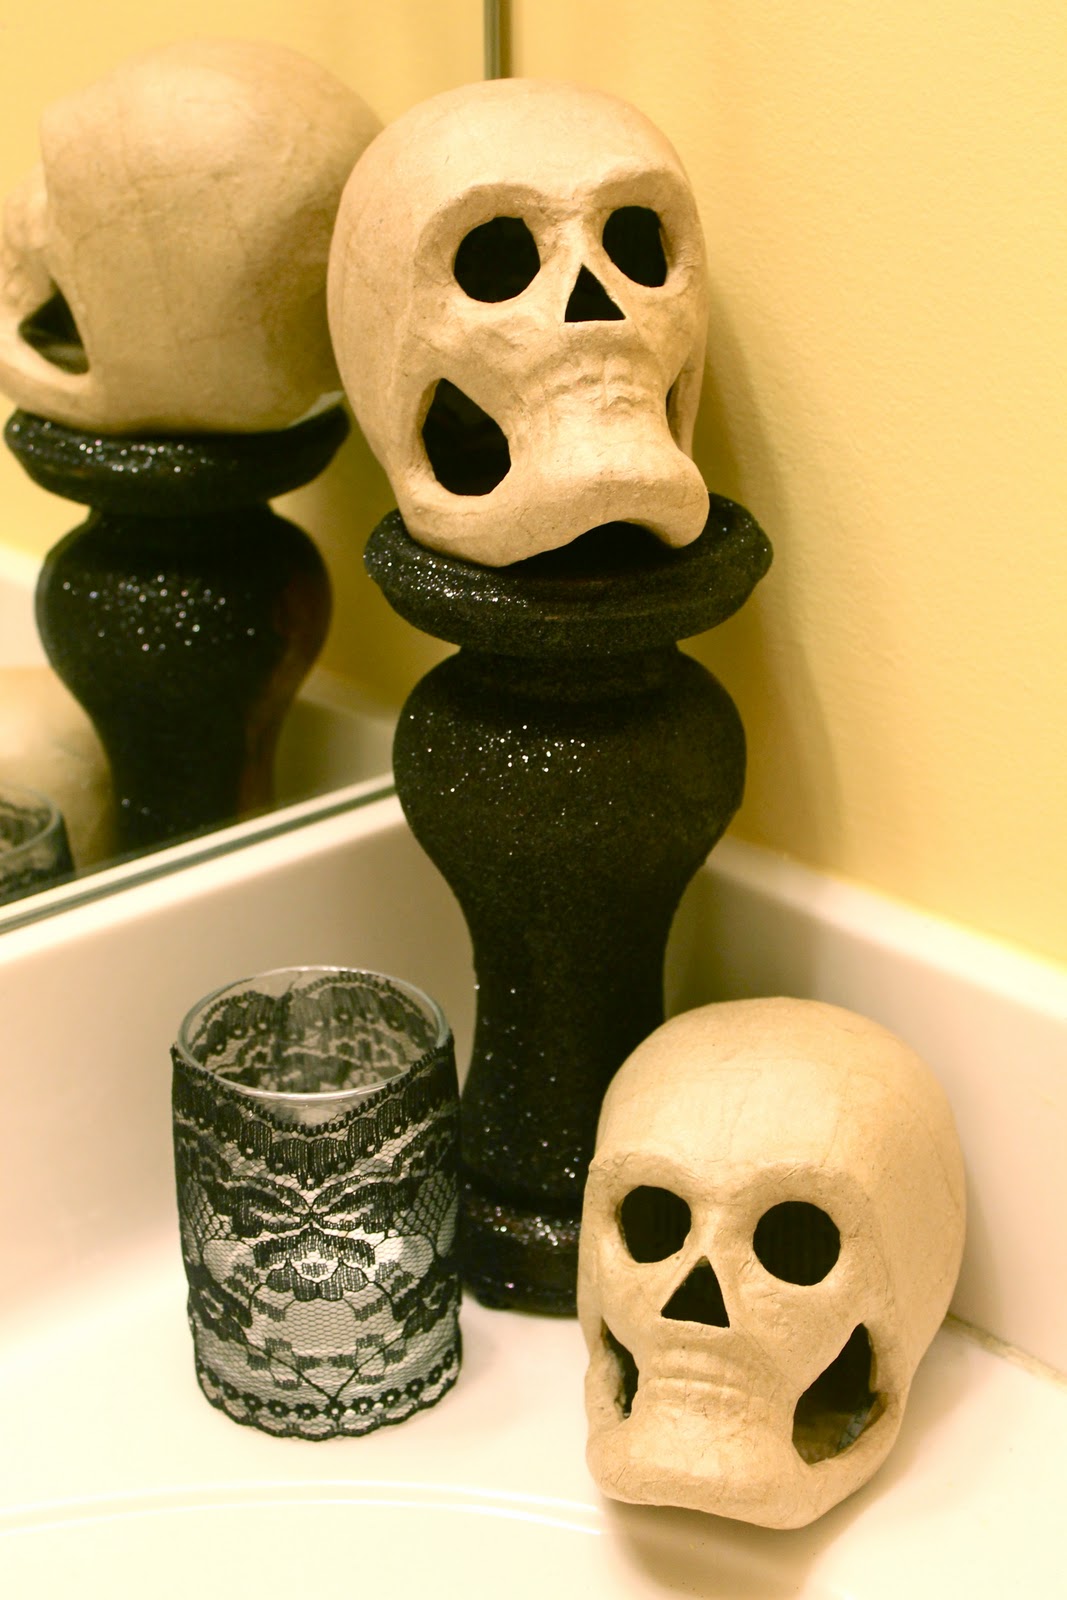
Glittered candlesticks, skulls, and black lace votives decorating the bathroom (I simply cut a rectangle of black lace and sewed it together to slip it around the votive. Idea take from somewhere?)
Glittered pumpkin votives (Idea taken from Martha Stewart).
The R2D2 and C3PO Costume tutorial is now up. Go see it here! Not that you need the tutorials for this year, but I just want to put them out there in case you need them sometime! ha.