PhotobucketPhotobucketPhotobucketPhotobucketPhotobucket

780x90

Hello! If you're new to Miss Lovie, I'd love for you to subscribe for free updates! You can subscribe by RSS feed or by email! Also be sure to follow on Facebook and Twitter for more Miss Lovie goodness!
Showing posts with label Christmas Decorations. Show all posts

Wednesday, November 28, 2012

Berries and Ornament Initial Wreath Tutorial

 I got excited when I was asked to create this wreath for a work friend because I knew I'd get to do something fun. I love the traditional Christmas colors, but I wanted this wreath to be extra bright and cheery since it was going on a first grade teacher's door. :) The lime-ish green ribbon I used to wrap the wreath did just the trick-and the polka dots of course. When it comes to decorating classrooms, polka-dots are always my go-to move. Ha.
I was originally going to do a picture tutorial, but this wreath was so easy, I didn't take step by step pictures. You can do it. 
Materials Needed: 
Wide ribbon  for the wreath(50% off at Michael's!)-mine was wired, but it doesn't need to be. 
More wide ribbon for the bow. 
Straw wreath form
Large Initial
Small paintbrush
Glue/mod podge, glitter
Berry sprigs (I used two different ones and trimmed them down to work for me)
Ornaments
Hot glue 
Wrap your wreath with the wide ribbon, adding hot glue every now and then as you go. 
Trim your sprigs some, mix and match, do whatever you like. Find a place where you think it looks right and hot glue it on. Hold it down for several seconds to insure it sticks since the sprigs will most likely be kinda heavy. Glue on some ornaments to fancy up the sprigs. 
 Paint large dots of glue dots on your initial. (Mine came white-from Michael's-, but you may need to paint yours if yours did not.) Sprinkle glitter over the glue dots and let dry. Once dry, tie a sweet little ribbon bow to your initial if you like! Glue the initial to the wreath over the bottom of the sprig. Make sure everything looks right and level. 
 Hot glue a fun ribbon on top and you're done! You can glue a knotted ribbon loop to the back of the wreath to use for hanging if you like. 
Hope you love this simple, but bright and happy idea for a Christmas wreath! 

Thanks for reading!
Sharing via the parties on my sidebar. 
Photobucket

Thursday, January 6, 2011

Ornament Pillows-a little late

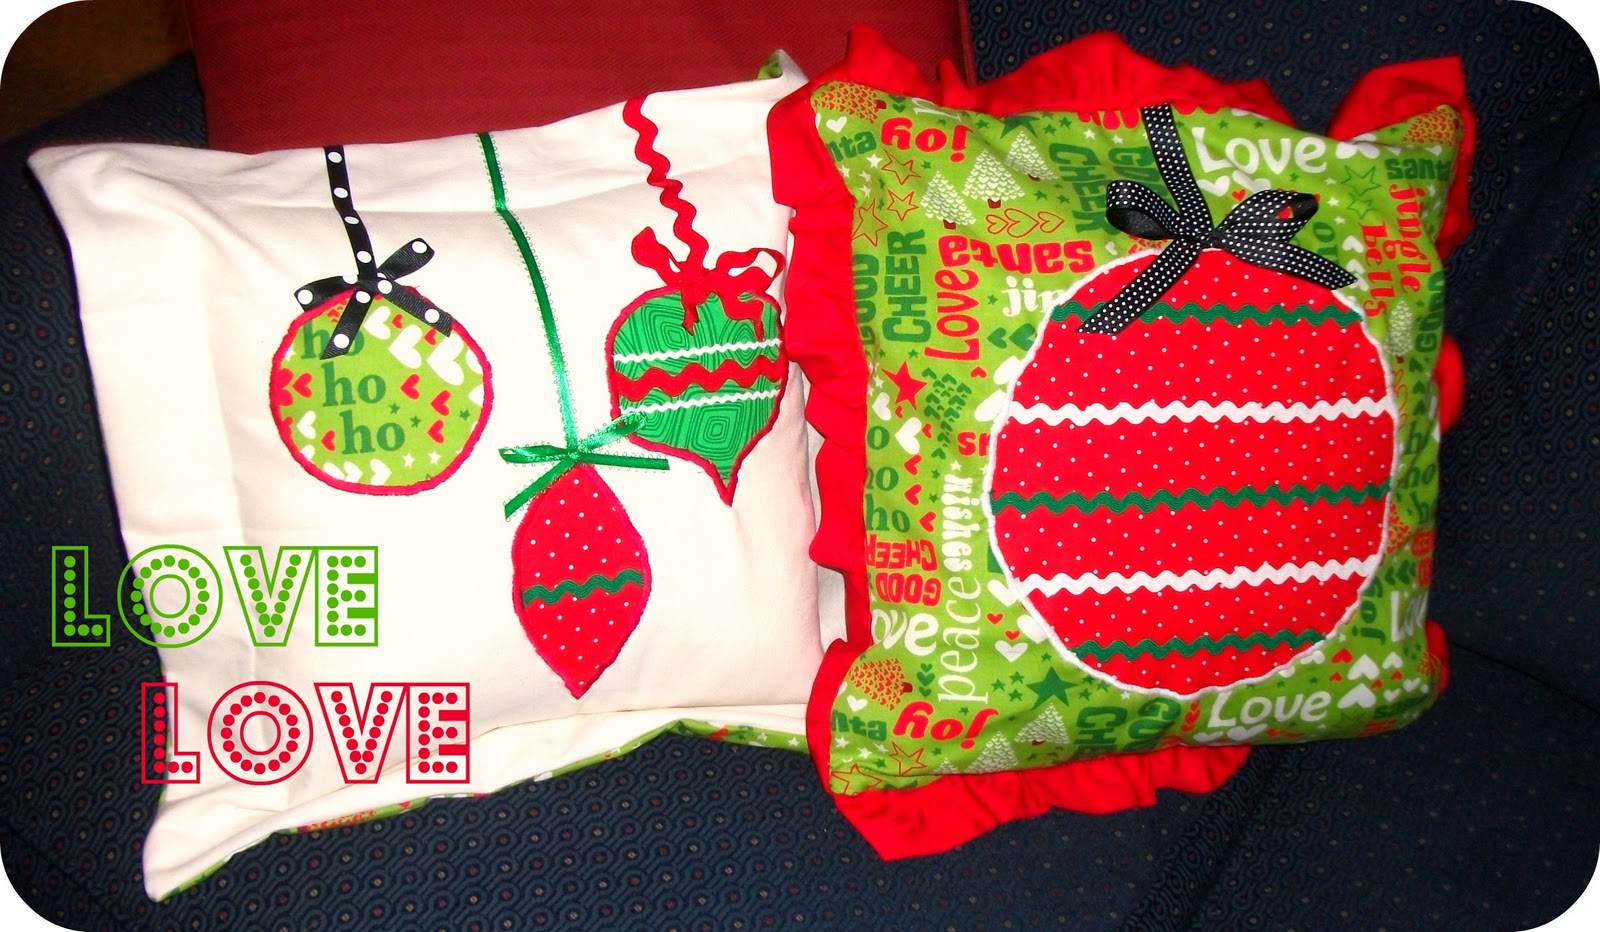
After seeing this post on Tatertots and Jello I knew I had to make some pillows like that! Instead of using fabric paint, though, like Jen from Tatertots and Jello did, I appliqued the fabric onto the pillow front and used a zig zag stitch to finish the applique. Everything else I did the same. I love how they turned out! 
My pillows were square and smaller than Jen's were in her tutorial so I had to use less ornaments, but I still like it. I didn't take pictures of the backs of these, but I just did an envelope closure on the back like Jen explains in her tutorial, as well. On the white canvas pillow I used the green print fabric for the back and on the large ornament pillow, I used solid red canvas. 
I guess I should've straightened the ruffles on this pillow before I took the pictures...goodness. I love the ruffles, but since I'd never used trim on pillows before, they're definitely not perfect. These were a gift for my step-mom, Marti, so the imperfections were no matter. She loved that they were homemade like most people do. I also made some more like this that are just a little different for my friend, Dara, and will post those pics when I have them.

For one of my first real sewing projects since I got my machine, I'm feeling pretty good about these. Yay.

I was sort of a pillow-making-machine this past Christmas. More pillows to come -don't worry the next ones aren't Christmas-y. I realize that wonderful holiday is actually over now (even though our tree is still up. Oops.) 

Wednesday, December 29, 2010

Fabric Fridge Frame

Happy Holidays, all! 

I hope everyone is having a wonderful holiday season. My blogging has been slow due to working hard on last-minute gifts (including this fabric frame) and traveling to visit families for the holidays. I'm actually in Savannah, GA now posting this while visiting Matt's family! I hope everyone else is loving their times with their families, as well.

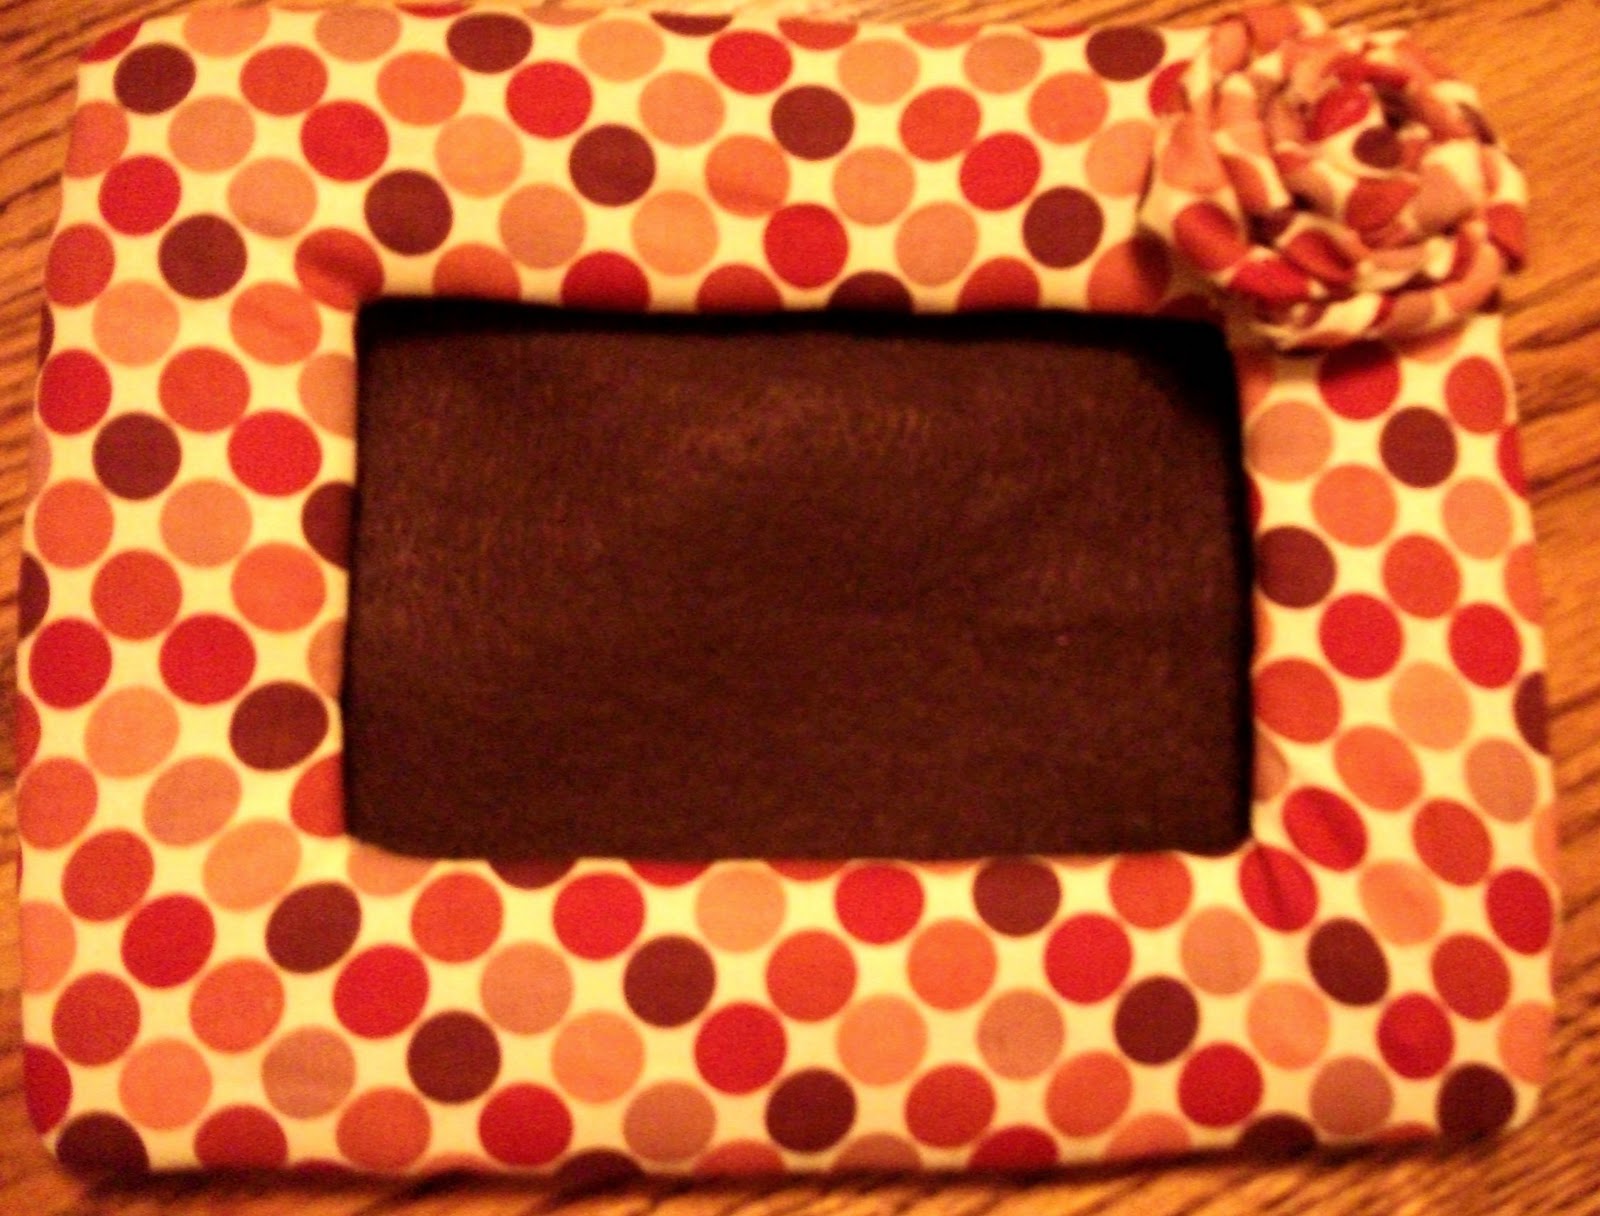
Remember how I said I would be posting some projects made using this precious Christmas fabric I found in this post, here? Well here's the first one! I made this frame and a few others for some teacher friends at school and a parent who helps in my classroom as their Christmas gifts. I used this tutorial that I found while browsing some of my favorite blogs.
This frame is for your fridge and has magnets on the back.

Since it is past Christmas, :) you can use other cute fabrics to make a frame that you can use year-round.


(Please excuse the poor quality of these pictures. My camera is far from professional and I took these around 7 am before going to school.)

I did my first one exactly like Jessica on How About Orange, but it wasn't puffy enough for me. On the next frames I made, however, I used 2 layers of batting and wrapped them around the back of the frame instead of cutting them exactly the same size of the frame so the frame would appear more puffy. I also used hot glue for all frames. When trying to decide what glue to use hot glue is always a great, easy choice. :)

Hopefully the holiday madness is beginning to slow down and I'll be posting more often. Check back soon!

Friday, December 17, 2010

Gingerbread Boy and Girl Ornaments


As usual, my ideas and craft plans are bigger than I can actually handle. I really wanted to make one of these to give to each of the kids in my class since I am giving them The Gingerbread Man book this year  (it was on sale for $1 on Scholastic!!), but of course they took way longer than I'd anticipated. I always assume these project ideas I have will just come together so fast without a hitch even though my projects rarely go that way. There's usually something I have to fix, redo, or I even completely change my mind on how I want the project to be. And of course, I'm not a machine.

I am so glad I made these two though. Now that I've figured out how I want them to be, making more would go faster, just not fast enough to make 24, though, in such a short time! :) I made these Tuesday night thinking I could knock them out in a couple days. I could have if we'd gotten a snow day, but no such luck. The kids were just as excited to get candy canes with their books, instead today. 

Here's how I made the girl! After you see the girl tutorial, the boy will be self- explanatory. 

1. Found a pattern online: gingerbread boy template I used this one for the boy and adapted this pattern to make the Gingerbread girl pattern as shown below.
2. Pin the pattern and cut out two felt gingerbread girls.
3. Glue on embellishments. I used white buttons for the girl, red buttons for the boy, and white ric rac on legs and arms. I first used fabric glue (liquid stitch) on the ric rac and buttons, and I tried to use it for the felt eyes and mouth, but it soaked through. I used the hot glue gun for the face. I could probably have used the glue gun for all embellishments.
4. I set aside gingerbread girl and sewed a ruffled strip of red felt for her skirt. Ruffle strip should be twice the length as your gingerbread girl and about an inch wide. My skirt strip before ruffling was 5 1/2 inches long and 1 inch wide I eyeballed mine just by holding up felt to the gingerbread girl to see where I wanted it to be and how far up on her body it should be. I made sure the bottom of the skirt would be touching the bottom of the "skirt" on the gingerbread girl cut-out. After sewing the ruffle skirt I pinned it to the girl and sewed it in place. (Here's a good tutorial on sewing ruffles if needed.)
5. Pin the top gingerbread pattern and the bottom pattern together. (Notice the skirt is not in this picture. I  kinda forgot that I should have sewed on the skirt before sewing the two cut-outs together. You should do it the other way around so the red thread doesn't show through on the back and there isn't a line across the back either! :) ) 
I forgot to take picture of it, but be sure to go ahead and put a loop of ribbon between the front and back gingerbread girl cut-outs at the top of the head. I put a dab of hot glue on the inside to hold it down so I wouldn't have to worry about it slipping around. 
6. At this point, you could use an embroidery stitch and thread and hand stitch around the edge, but I chose to sew it on the machine since I was trying to be fast. It may have been just as fast embroidering, but I don't have any experience with that so I went with sewing. I needed the practice anyway. :) It seems that most felt ornaments are made using embroidery stitches.

7. I made the felt bow using this tutorial  and hot glued it on. The felt strip I used to make the bow was about a 1/2 inch wide and 3 inches long. 
I made the boy the same way!

There are a lot of sweet Gingerbread boy and girl ornaments out there so this is just one way to make them. I just thought I'd share mine. :)
They look pretty sweet on our tree. Maybe if I start in June of next year and make a couple once a week I'll have them ready for next year's kids. haha. 

Linking this post at Craft Envy. Check out more awesome handmade Christmas crafts on her awesome blog!
HollyBloggyButton1

Sunday, December 12, 2010

More Wreaths and Sewing in Progress


I saw this fabric at JoAnn's and had to have it. Luckily I found it on the day all Christmas fabrics were 50% off. Trips to the Super JoAnn's 5 minutes from where I live can get pretty expensive.
I just love this one especially. That little heart tree is precious. I am working on a few sewing projects that will eventually be gifts using this fabric. I will post the finished products soon so keep checking back!! Sewing is very new to me since I just got my machine only a month or so ago but I'm catching on! Thanks to the best boyfriend in the world I have a great machine and I LOVE sewing so far. :) 

In the meantime, here are a couple more wreaths I made for the holiday season!
This first one is a revamp of two wreaths I already had: a pre-lit wreath I'd gotten at Wal-mart the year before and didn't have a place for this year and a scraggly tired berry wreath that was on it's last leg. 

I simply put the berry one on top of the pre-lit one, secured them together with floral wire and attached a red bow. I wanted to use Martha Stewart's idea here on how to attach a wreath to a mirror, but I didn't have any thumb tacks and I didn't want to take the mirror down since it was no fun to get up on the wall. Instead of using tacks I just took my hot glue gun and put a dot of glue on each side of the ribbon and attached it to the back of the mirror where it stuck out from the wall some. Perfect. It's been up for a couple weeks so I think it's secure. Isn't hot glue amazing?!

I made this one for my sister's door. Again, I just got an evergreen wreath at Hobby Lobby on sale to work with. I got the berries (some are shimmery and some are glittery) at Hobby Lobby also while all their decorations were 50% off. I got the ribbon that I tied in a bow and the silver curly-Q things from Wal-Mart! I'm telling you, they've got a great selection this year! The curly-Q things came in a bunch and I just cut them apart. I attached everything with floral wire.
Easy! 

Wow, we've got a lot of snow where we are! Hope you are toasty, warm, and safe where you are! 

Merry Christmas!

Saturday, December 11, 2010

Ornament Wreath

I just love how this ornament wreath turned out!

 I was inspired by Martha Stewart's ornament wreath on her website: Martha's version.

We all know how incredible Martha is, but sometimes her instructions can be complicated and supplies hard to find- at least for me anyway. So instead of purchasing a wire wreath form and ornaments on wire stems (where do you even find those?!) I opted for an easier, more-cost-effective version. 

I bought several boxes of ornaments at Wal-mart (their selection was so great this year!), both large and small. I bought the evergreen wreath and foam wreath form on sale at Michael's. Whatever size you choose, your foam wreath form should fit just around the inside of your evergreen wreath as pictured below.
First, I used floral wire to attach the wreath form to the evergreen wreath in several places around the wreath. I feel like I saw someone else make a wreath similar to Martha's against an evergreen wreath, but I'm not sure where.
Then glue on your ornaments, alternating colors. Glue the large ones on first, ornament stem down. (I removed all the ornament tops that hold the wires before this step because I was afraid the silver and gold would show through, but if you put on plenty of ornaments you may not have to worry about that step.) I glued down clusters of large ornaments first and then glued the small ones in the open spaces.

When gluing the ornaments I first glued the ornament to the wreath form then put spots of glue on the ornaments that would be touching the one I was gluing down. The hard part was guessing where they would actually touch. Once you get going, though, it gets easier.
 I started gluing in one spot and worked until I got all the way around the wreath ensuring there were as few open spaces as possible. Fill any open spaces with small ornaments. It's okay to glue small ones right on top of the big ones. This wreath is BIG. 
Hang it up and adore the merriment it creates! This wreath is very large and makes a big statement on my front door. I'd show you the big picture of my entire door, but my apartment hallway is less than exciting. 

Happy Holidays!!
Linking this post on The Shabby Chic Cottage for the Holly Bloggy Christmas Party. Check it out for beautiful Christmas decorations.

HollyBloggyButton1

YAY! My wreath was featured! :)
oneprettything
Related Posts Plugin for WordPress, Blogger...

invisible ad