PhotobucketPhotobucketPhotobucketPhotobucketPhotobucket

780x90

Hello! If you're new to Miss Lovie, I'd love for you to subscribe for free updates! You can subscribe by RSS feed or by email! Also be sure to follow on Facebook and Twitter for more Miss Lovie goodness!
Showing posts with label Spring. Show all posts

Tuesday, March 25, 2014

Spring Sketchy Dot Placemats


Today I'm over at Thirty Handmade Days with this super fun tutorial, Spring Sketchy Dot Placemats!


I definitely may have just taken down the Christmas placemats before putting these on the table so (in March) it was high time for a change - a bright and happy spring-y change! 


Go check out the full tutorial and more pictures at 30Days! I'd love to hear what you think!

Photobucket

Saturday, March 16, 2013

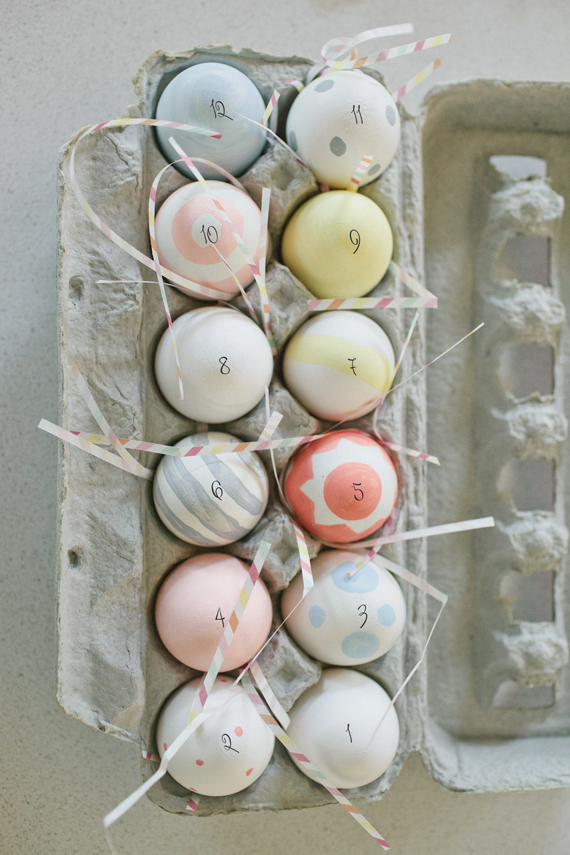
12 Unique Easter Decorating Ideas

Happy St. Patrick's Day Eve! I hope everyone is enjoying this fun holiday! 
Today is not Thursday, but I just had to share these great Easter ideas with you! 
Enjoy!
These are so pretty. And you've got to go check out her post-she has surprises inside the hollowed out eggs! So cute. 
Alisa Burke can do no wrong. Love these fun eggs. 

 Easter Wreath by Amy atPositively Splendid
This wreath is SO bright and cheery. She has links to a tutorial on how to make the stuffed eggs on her blog as well as her Easter mantle. Go check it out! 
I love this tablescape. The brass bunnies and eggs are my very favorite. 
Scribble Eggs by Camilla at Family Chic
These are so fun and kid friendly!!
Love this style! These are so easy and sweet.
I always love anything gold. These are so fun!!
AHH! I need these immediately. So so so cute. And pretty easy, too!
Love these fun washi tape eggs. So unique and fun.
Easter Decor by Jennifer at Dear Lillie 
This natural Easter decor is just beautiful. You have to go see the rest of this room. 
Thumb Tack Polka Dot Eggs  by Brittni at Paper N Stitch
These are very easy and unique. Love 'em.
These were just too gorgeous not to include. They'd be great to make and keep to bring out every year!

I hope you enjoyed this fun Easter roundup!
Miss Lovie Creations
If you were featured, feel free to grab a button! 
Photobucket

Wednesday, March 21, 2012

Hello, Forsythia. It Must Be Spring.

Happy Spring!!!

Just thought I'd check in with some pretty spring pictures for a second between my grad school homework and parent teacher conferences at school this week. No Favorite Things Thursday. It will resume soon! 

When I noticed the forsythia in our neighborhood was starting to bloom, I rushed outside to get a few quick pics before it got dark after I got home from school the other night. There's just something about that in-your-face-intense yellow color that gets me so excited for spring. I know spring is all about the pastels, but most of the time I feel pretty ick about pastels. This crazy yellow, though, is great. I also love how forsythia grows. Crazy. My friend and I used to have some faux forsythia in a pot in our apartment back in the day. We donned it, "The monster plant". A lot of people trim their forsythia like bushes, but I like it when people let it grow free and wild: 
Like this. Yes.
 Seeing that bright yellow bush starting to bloom was exciting.
I love how quick spring happens, too. I feel like the grass got greener and trees had burst into full bloom over night. 

Here's some forsythia-themed ideas I might be doing if I had any time whatsoever to do them. :) Enjoy.

Love, love, love.

Are you sweating already? We are around here. Our temps don't say spring at all. They say summer. 
I'm not upset about it, but, I mean, open the pool already.

I hope all is well with you. Next week our Spring Break starts and I could not be more excited. 4 more school days! 

Photobucket

Tuesday, April 19, 2011

Spring Moss and Rosette Wreath

After seeing all the beautiful moss wreaths out there (and knowing my step-mom's birthday was coming up) I had to create my own version. 

Here's some of the inspiration I found that made me want to try it out:
[IMG_5816.JPG]

Ahhh!
 I just love all of those! Especially the last one. I thought rosettes would look so lovely and simple on a moss wreath. 
 I used Spanish moss because it was the cheapest at Hobby Lobby. 
(And I still have half a bag left!)
 My parents like monogram W things.

At first I was just going to use white rosettes. So glad I threw the aqua and tan in there. 
It made it so much prettier! 

I tried spray-painting the sticks, but regular acrylic paint worked better. 

I wanted to hang it on my parents' door like this:
but as you may be able to tell in the picture, the door wouldn't actually close with the hanger that I bought for them. 

A crafty gal always has a Plan B.....
.....or at least figures one out last minute.
 They already have one of those fantastic heavy duty magnetic hooks that attaches to glass or metal so I just made a little loop to glue on the back of the wreath,
And then just tied the excess ribbon into a bow. 
So it actually ended up hanging on the storm door instead. 

These moss wreaths, while time-consuming, are actually pretty easy.

Just know that you will definitely get moss everywhere. 
 Ok so maybe your mess wouldn't look as bad as mine, but this is just to show you how it could be (and will be if your a messy crafter like me). Definitely lay down a sheet.
 I mean, really, Allie? hahahaha. 

All you really need to know to make this wreath is:
  • Hot glue that moss on there like crazy, pressing down firmly each time to be sure it fills in all the holes. This will take longer than you think. :) And more glue sticks than you think. Stock up!
  • Make some fabulous rosettes in 3 or more colors
  • Paint some sticks white and glue them on first and then glue the rosettes on top so it looks cleaner.
  • Paint a letter and hot glue it on. 
  • Find some matching ribbon to hang it with and you're done!

Easy!
Since I have half a bag left, I might need one for me.
As always I'm linking to these parties.

Thursday, April 14, 2011

Easter Flower Onesie Dress Tutorial

Today I'm guest posting over at Kiki Creates' All About Easter Event! Be sure to go over and check out my post and everything else she has going on for the event, too! Such cute ideas!


blog button final
If you're visiting from Kiki Creates, welcome!

Ready to see how to make my Sweet Easter Flower Onesie Dress?

I mixed two fabulous sewing tutorials to create this dress. 
 Target Flower Pillow Tutorial from I Create It

I couldn't wait to try either one of those tutorials and I'm excited that they both worked for this dress!

Step 1: Gather materials.
  • Onesie of a desired size. The tutorial is for a 6-9 month sized onesie. 
  • 1/4 yard of fabric for the skirt part (and sleeves if you want). 
  • Less than 1/8 yards of fabric for the flowers (3 different colors)
  • ric rac or other embellishment for flower stems and hem of the dress
  • matching thread (I used white on all flowers.) and pins
  • water soluble pen
  • circle template (a paint bottle worked for me)

Step 2: Make the dress.
Follow the directions on the Summer Onesie Tutorial to make the dress. She has instructions on how to make that sweet headband, and how to put the bird on, but I just used the dress directions. I wanted to add sleeves to mine, but ran out of time. It looked darling without them, but I love the look of them, too. I also did not add a strip to my skirt and instead sewed ric rac to the bottom hem of the dress. Embellish it how you want!

After I had the dress part made, I sewed matching ric rac to the bottom hem of the dress.

Step 2: Sew on Flowers
Once your dress is made, add the flower embellishments. Sew on the ric rac stems first.

Then use the  Target Flower Pillow Tutorial to sew on your flowers. 
First find a good item to trace circles with. My paint bottle seemed to be the perfect size. Use a water soluble pen to trace your circles above the stems. When drawing the circles for the flowers, be sure that some of the stem will get sewn under the flower. 
I tried one flower with the tube of fabric like the tutorial suggests, but it was a lot of work because the tubes were so tiny. I also thought the slightly frayed look might be cute, so I tried using just a strip of fabric.  

You can see in the picture above that the strip is about 1.5 in. wide and is folded in half. I'm not sure how long the strips were. I just cut the strip from a 45" wide fabric bolt and used the strip until I didn't need any more and cut the excess off when ready. 
As you sew, fold the strip over  towards the middle of the circle each time you get to the edge to stay within the circle. (Be sure to read the Target pillow tutorial for this step. She has great detailed instructions!)
After I finished each flower I sewed straight across the flower several times in different directions just to catch all those frayed edges and get the flowers to lay a little flatter. This step is probably optional, but I liked the way it made them look. 
If you want, add a sweet tag. I sewed this to the front and back of the backside of the onesie. 
Done!
To make the clip above, follow the steps to make the flower, but sew it onto a piece of felt, cut the felt out. Then cut out a leaf shape, sew it to felt and hot glue it to the back of the flower. Hot glue on an alligator clip to the back and you can clip it to any headband you want!
 Flower clip up close. 
Your sweet girl can wear it as shown or with the leaf more to the side. 

Sweetie.
Big thanks to my friend Rachel for volunteering her daughter, Adia, to be my model!

Enjoy! And thanks for reading!

Related Posts Plugin for WordPress, Blogger...

invisible ad