I know. Fall is over, I guess. But it's really not, people. I know the department stores, your neighbors' house strung with lights, Pinterest, and all the bloggers ever are insisting it's Christmas already, but it's actually not winter yet. We haven't even had Thanksgiving!! Believe me, I'm tempted, just like you, to stay up until 1 am decorating the Christmas tree almost every night of the week these days, but I refrain. Why? Because I love pumpkins. I can't bear to throw them away yet. They're not even rotting. Also because of Thanksgiving.
I thought for just a minute I might be hosting Thanksgiving this year for my family, and even though I'm not now, I decided to decorate my mantel for the holiday. More on that in this post! I knew I needed a cute flag bunting to hang. Luckily I had already made this sweet fabric heart one for our rehearsal dinner before our wedding a couple weeks ago! I love it when I can reuse decorations for different occasions.
Sadly I don't have any quality pictures of it on the mantel at the Rehearsal Dinner. It was pretty cute there, too.
Want to make a sweet fabric heart bunting for your house, too?
Of course you do, this could be used for ANY holiday or season- not just Fall or Thanksgiving. Think pink and red patterned fabrics for Valentine's Day, plaids and reds and greens for Christmas, or your child's favorite colors for their birthday! Bam. Most versatile bunting tutorial ever.
Let's go.
Gather Materials:
Glitter scrapbook paper, Kraft card stock, twine, fabric, hole punch, scissors, a pen glue and
Create the Flags.
Print the
templates onto card stock and cut out. Use templates to trace and cut the flags onto the paper and then glue. I made 12 flags and this made my bunting about 5 feet long.
Trace and cut the hearts into the fabrics.
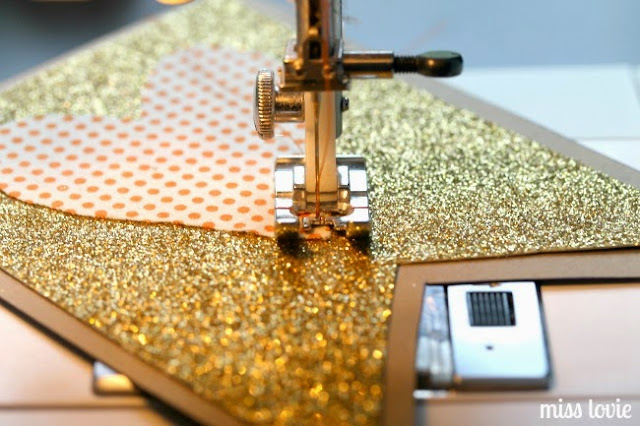
Sew the hearts onto the flags. I didn't pin these or anything because it's difficult to do through the paper so the fabric will shift on you some. I found it easy to sew one side of the heart and then turn the paper while the needle was still down, sew back over the side I had just sewn and then sew the other side. After a little trial and error, I found that this decreased the amount of bubbles in the fabric. It may not be totally flat, but that's okay. I then sewed around the heart another time or two to create a kind of sketchy outline as you can see in the photo below.
You finished a flag! Repeat however long your hear desires.
String the Flags.
Use a hole punch at the top of the flags as shown and thread the twine through, starting at the back, allowing the twine to sit on top of the flag and then threading it to the back again.
Hot glue some bows onto each side if you like and you're done! If you like, you could put a tiny dot of hot glue on the back of each flag and press the twine into it once you have it placed where you want so the flags don't slide around. I didn't do this in case I want to use the bunting somewhere else and space the flags out a little more. They don't really move too much once you've got them hung.
Thanks for reading. It's good to be back. I hope to post a little more regularly now that the wedding is over. More diy wedding tutorials are definitely in this little blog's horizon as well.
Happy Holidays!


