PhotobucketPhotobucketPhotobucketPhotobucketPhotobucket

780x90

Hello! If you're new to Miss Lovie, I'd love for you to subscribe for free updates! You can subscribe by RSS feed or by email! Also be sure to follow on Facebook and Twitter for more Miss Lovie goodness!

Monday, September 26, 2011

Halloween Candy Jars with Kiki Creates

Hi everyone! I am so excited to be here for Creepy Crafty Halloween on Miss Lovie!
I'm Kiki.
I blog at Kiki Creates where you can find projects, DIY, tutorials, free printables and the inspiration it all comes from. I also have an etsy shop where I sell inspirational, funky and fun art prints for the home.
Halloween is one of my favorite times of year.  I love the treats, the decorations, the costumes, etc.
Today I am excited to show you a sweet and simple project that will come together really quickly!
Here are my Halloween Candy Jars:
I love it when company's make sweet little candy jars for Halloween, so I thought I would put my spin on the candy jar for the season!
To make these candy jars all you need is:
a candy jar (I found mine at Wal-Mart) and candy to fill it
printed Halloween labels
do-dads for embellishing
hot glue
Happy Halloween
For this jar, I simply used tootsie rolls, but that can easily be swapped out!  Fill jar and cut out patterened paper in 1 inch strip. Make an accodian with paper and lay it flat  while you glue it\\the label  on.
Isn't it so cute!
You can add a little shimmer, by adding glue and glitter to the paper!
 Monster Eyes:
This time I used a cute little bag of gummy eyeballs for this jar.
 I wanted to show you how simple you can make yours!
Simply cut out some paper strips and punch the sides...
Then just add the label right on top of the paper. Super simple!
Rotten Witches Teeth
Fill your jar with candy corn. Cut paper strip and punch with paper punch. Mine is using the Martha Stewart cobweb punch.
Using some streamers, simply ruffle it ( you can do this on your sewing machine or just use hot glue)
Add the label on top of the crepe paper and add the cute medallion to your jar.
Hope you have fun making and giving away these fun little treat jars.
Have a Happy Halloween!  Thanks for having me, Miss Lovie!

Oh, my. I can't wait to print these and use them in my classroom near Halloween. My kindergarteners will just loooove them. The embellishments you put with them are just perfect. Who else is running to the printer??!

Be sure to go say hi to Kiki on her blog and browse around. She is a great source of inspiration. Need more Halloween ideas? She's got quite a few already up on her blog this year! Go check out the Halloween Bark RecipeWitch's Broom Tutorial, and Pottery Barn Knock-Off Halloween Tree. And as you can see from the post today, her printables are always great. You can buy lots of  great printables from her shop!

Thanks for reading and check back tomorrow for another great Creepy Crafty Halloween guest!

Also be sure to enter the new giveaway! Headbands for your pup by Young Urban Puppy! The Halloween Boo! Bunting giveaway is still going, too! 
     Miss Lovie


Photobucket

Halloween Doggie Headband Giveaway with Young Urban Puppy

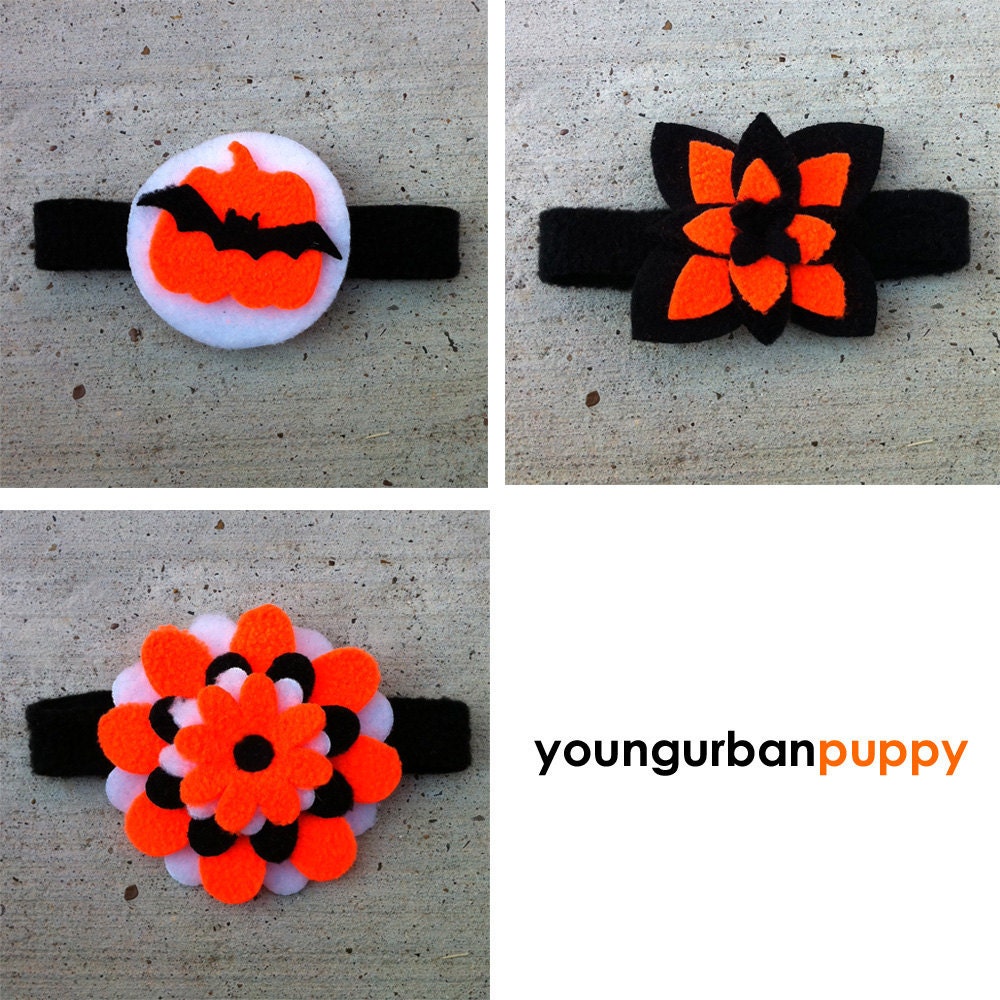
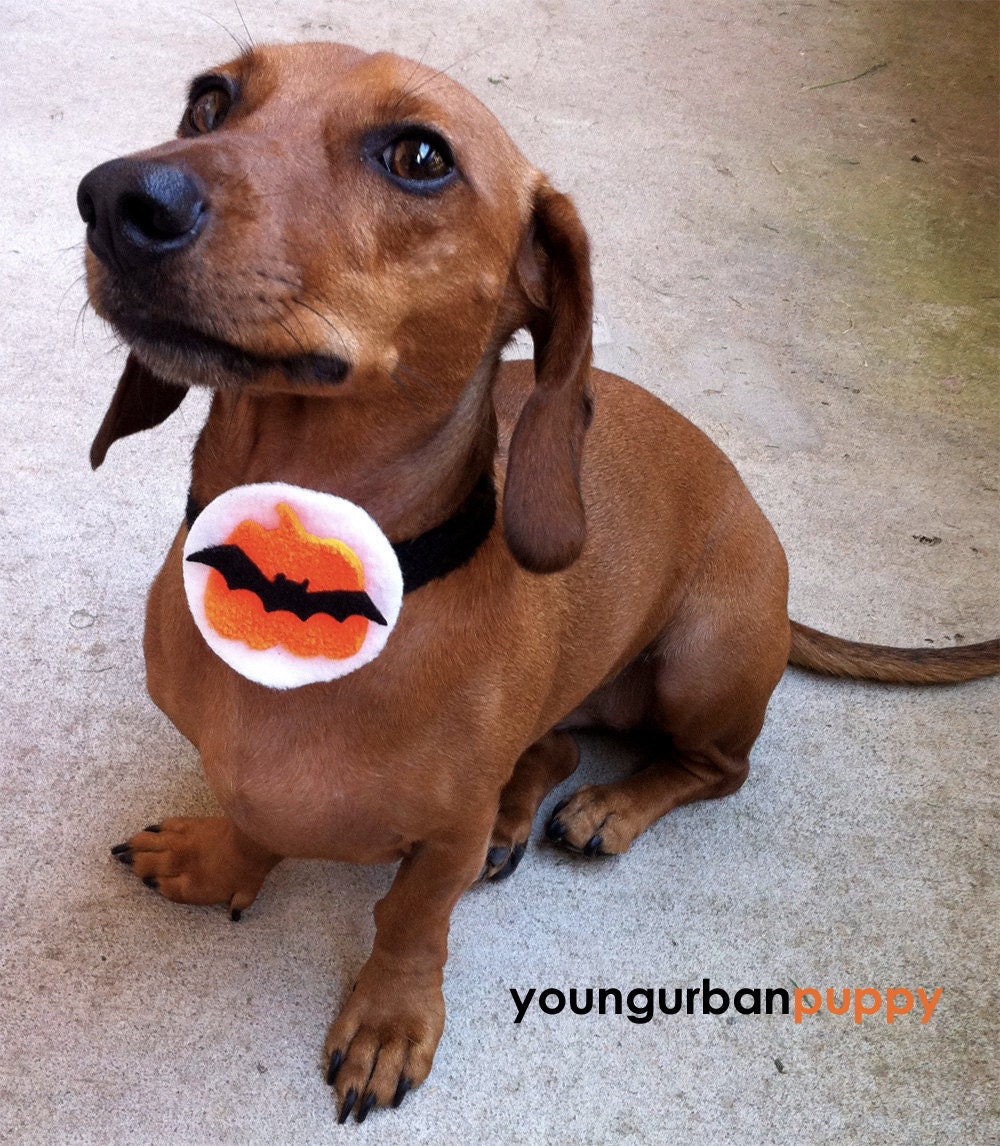
Today's Halloween giveaway is for a precious set of these Halloween Doggie Headbands from Young Urban Puppy , a fabulous shop run by Jenielle with costumes and accessories for your dog.
Halloween Neon Orange and Black Flower or Collar Tie for Dogs
How fun are those?!  

Here is Jenielle's description of her handmade headbands:
 Your pup will be in the Halloween spirit with this set of Halloween headbands. They all feature neon orange, black and white and are hand cut and custom made. This headband is specially engineered to stay put even during the most ferocious head shakes! If your puppy is a boy, this design can also be worn as a collar adornment.

Each headband is custom hand made to fit your pup’s head. 
Halloween Neon Orange and Black Flower or Collar Tie for DogsHalloween Neon Orange and Black Flower or Collar Tie for Dogs
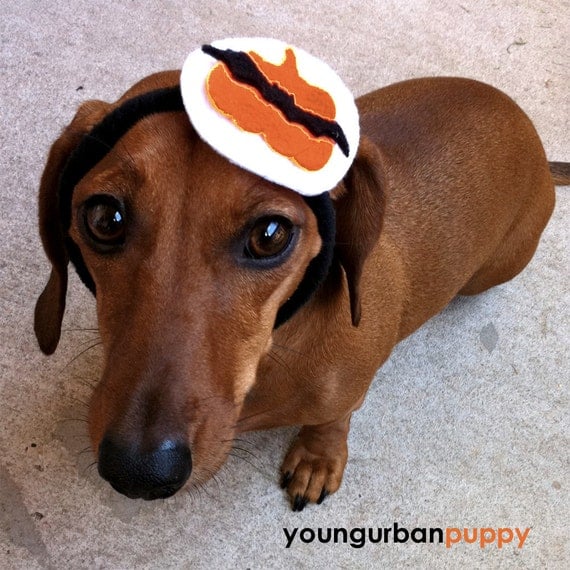
As Jenielle describes, your pooch can wear them around her head, 
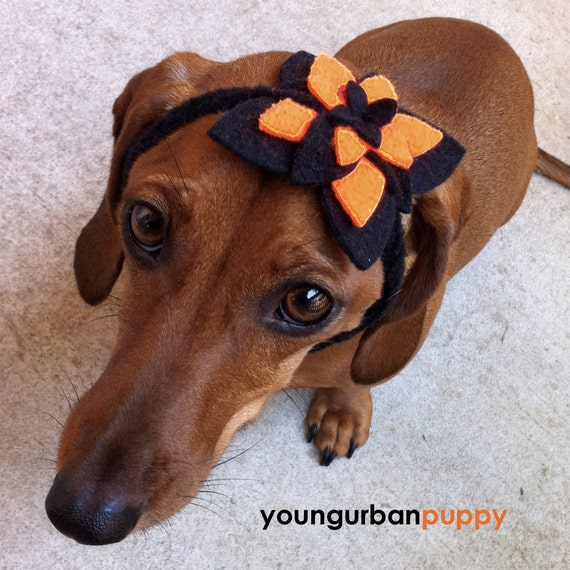
or as a collar! 

And if you have not visited her shop yet, go there immediately. She has the cutest custom-made Halloween costumes for your pup. She says to allow 2 weeks for it to be made. You've still got time for this year!

Want to win these cute headbands for your doggie?
Halloween Neon Orange and Black Flower or Collar Tie for Dogs
Do any one (or all if you wish) for a chance to win. Each thing you do counts as one entry. Comment for each one you do on this post!
Enter the giveaway by:

Blog, tweet, or facebook about this giveaway (up to 3 entries!)

Oh, and you'll be glad you liked her on FB because she advertises secret sales for her shop AND she adds pictures of her and her dog, Parsnip's, matching outfits. Check out the awesome album here.

Good Luck! And thanks Young Urban Puppy!
Giveaway ends Saturday, October 1 at midnight (eastern time) and winner will be chosen by Random.org.

Giveaway now closed!
Photobucket

Sunday, September 25, 2011

Spooky Door Hanger with Naptime Crafters

Hi I'm Amy from Nap Time Crafters!
I LOVE every kind of craft, but if I had to pick a fav it would definitely be sewing for my little girl. I also love decorating my apartment with very budget friendly projects. Nap Time Crafters is home to 100 free Tutorials {and growing!}, the American Crafter Competition, Friday Favs Party, & a Giveaway every Saturday!

I'm so excited to be part of the Creepy Crafty Halloween event! It gave me just the excuse I needed to make this quick and simple door hanger


Really dresses up our front door and gets me in the mood for Fall!
Ready to make your own?

Here's what you'll need:
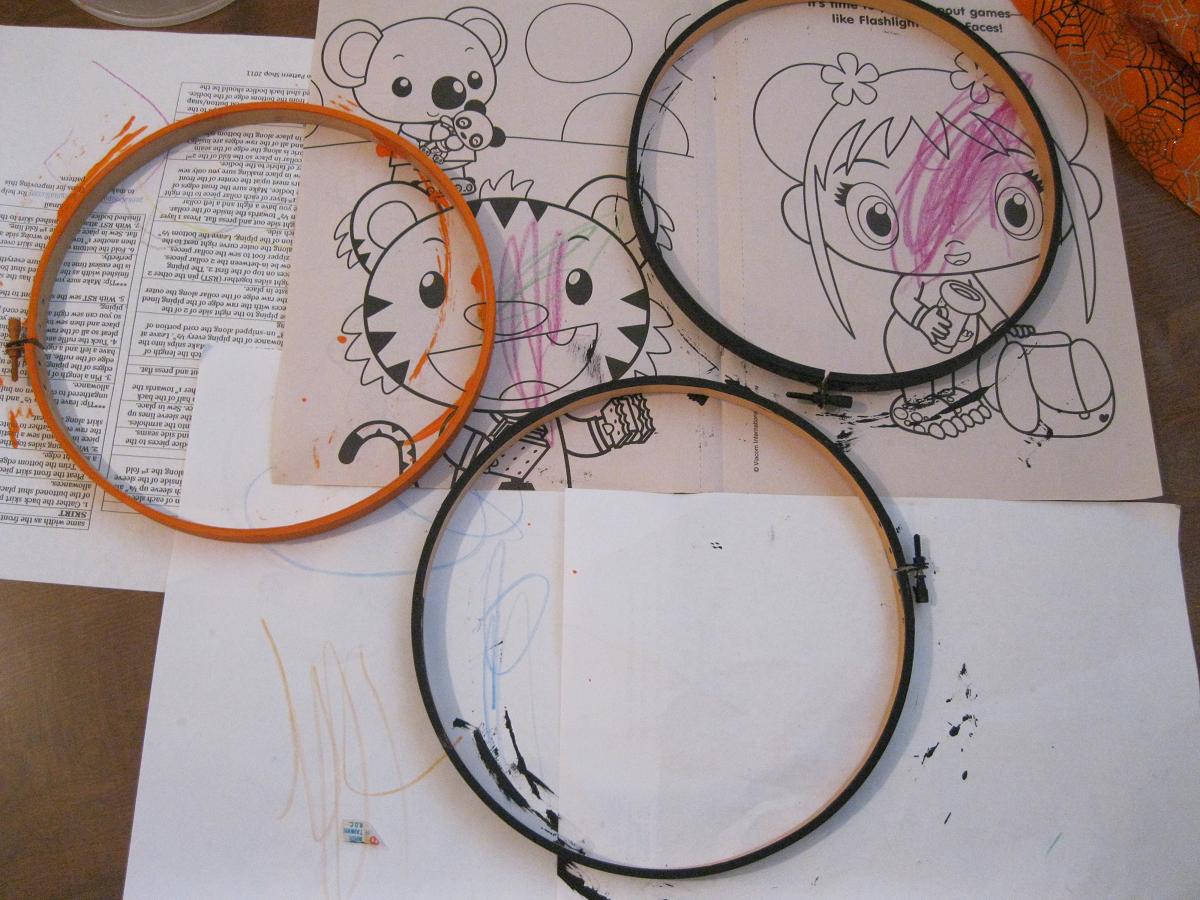
  • 3 8" embroidery hoops
  • 3 9" fabric scraps
  • Fabric scraps for embellishing
  • Craft Paint
  • Hot Glue Gun


 1. Paint the outside ring of each embroidery hoop- don't worry about the inside one b/c it won't show
 2. I did reverse applique for my letters and it was actually much easier than I thought it would be! Pin your fabric scrap wrong side up to the wrong side of your 9" fabric piece. Trace your letters onto the wrong side of your fabric scrap (make sure it's backwards) and then stitch around it, sewing through both layers of fabric 
 3. Trim the excess fabric away from the front side making sure you only cut through the top layer of fabric. (sorry about the sideways picture...)
 4. Put each fabric piece inside the embroidery hoop and hot glue the fabric edges to the back
 5. Arrange your embroidery hoops and hot glue together
 6. Hot glue a safety pin to the back of the top 2 to use for hanging. 
7. Thread your ribbon through and enjoy!
Thanks for having me!


OOH, Amy! How cute!! What a great alternative to a wreath, right? The fabrics are so fun, too. I always love your great tutorials! If you're not a fan of Amy's blog yet, you should be! You'll see me linking to her Friday Favs Party every Friday, too! Need some more great ideas for fall? Check out some of my favorite tutorials from Amy that are perfect for fall: Toddler Sweater DressCandy Corn Ruffle Tee , or her Halloween Finger Puppets! LOVE 'em. You might also want to check out Amy's shop where she shares lots of children's clothing patterns! 
Thanks, Amy!

Ok everybody! Check back tomorrow for another great Halloween project and tutorial from another Creepy Crafty Halloween guest!


And be sure to click the picture below to enter the Halloween giveaway going on right now!


Miss Lovie
Photobucket

Saturday, September 24, 2011

Batty Table Runner {A Tutorial} and Creepy Crafty Halloween Finally Begins!

Hello, all! 
Welcome to Creepy Crafty Halloween at Miss Lovie!
Today I'm sharing my Halloween tutorial, but be sure to check back all week next week and then through the beginning of the next week for some more great Halloween projects and tutorials by these lovely ladies: Tidbits from the Tremaynes Oopsey DaisyNaptime Crafters,  Kiki CreatesTeach, Craft, LoveDelia CreatesA Glimpse Inside, and
What do you think of my Batty Table Runner?!
I'm kinda loving it. 

It's made almost the same way as my Ruffles and Hearts Table Runner from Valentine's Day seen here:

So spooooky! Ha. 
I had a little fun with some pumpkins, too. It's so easy....add Mod Podge to the stem, coat on the black glitter, and hot glue some ribbon and trim on and you've got the cutest pumpkins everrrrrr.
I don't remember where I saw the ribbon-wrapped pumpkins or a pumpkin on a candlestick (probably on Pinterest), but I love it!
OOOOOooooooooOOOOH!
Have you seen these in the Martha Stewart Crafts section at Michael's? Make your own with the bat template, a little Modge Podge, and glitter!

Ok! Ready to make your own spooky batty runner?!
Here we go. This table runner is super easy. It is a little time consuming though. Some of it you can do sitting in front of the TV, though!

1. Gather Materials:
1 1/2 yds. (or more depending on how long you want your runner) of orange burlap
1/2 a yd. of black felt, 2 different black printed fabric,
1 yd. of spooky black lace
A little under 4 yds. of sequin or other fun trim

Pellon Wonder-Under (or any fusible interfacing)
Good scissors and other sewing essentials

2. Cut Runner Pieces.
Your measurements may change depending on where you're planning to place your runner. I'm putting my runner on a console table. My table is 15"x48" so I cut 2 pieces of orange burlap into 13x54 inches. This gives me 5 inches of runner on each end (for the ruffles) and it will be almost as wide as the table with an inch of table on each side of the runner if I placed it in the middle.

3. Cut out your bats!
You can do this part while watching your favorite show!
Copy the bat template onto a word document and resize it several different times to create different sized bats. Print out the template onto cardstock and cut out. Fold fabric in half and pin the center of the template to the fold and cut.

In order to make the 2 sided fabric bats, fuse a large piece of the fabric together following the directions on the package of the Wonder Under. Then fold the fabric in half like you would any other fabric, pin the center of the template to the fold and cut as usual.
I cut way too many bats. Which means I'll have to do another project! You really only need about 15 in each different fabric in various sizes.

4. Pin and Sew
Start pinning first line of bats in the center of one piece of the burlap. (You'll sew the other piece to it later). When pinning the bats, start 1 1/2 inches from the top and pin a bat and then pin one 1 1/2 inches form the bottom and pin one. Then space out the bats in between. Use 5 bats in each row. 
Line up the center of each bat with your ruler. 
All pinned.
When you go to make another line of bats, measure where the middle of that line should be by placing the largest bat a half inch away from a large bat in the line already pinned. Where the middle of that bat lands should be your middle for the next line.

Work your way out. I ended up with ____lines of bats.
When you get towards the end, leave 5 inches on each end to sew the ruffles. 
Sew a vertical line down the center of each line of bats with black thread. Start and end the vertical line 5/8inches away from each edge so the lines will match up with your topstitch seam later.
This part is optional, but it might help the runner have more longevity. Tack down the wings with 3 or 4 stitches (and backstitches) on each side. 
I did not cut the thread between each wing and just went back and cut all loose threads after I finished sewing. 
When all the bats are sewed on, pin the second piece of burlap to the one you pinned the bats to WRONG sides together. We're just going to topstitch. 
With a 5/8 inch seam allowance, sew all the way around the 2 pieces of burlap. 
I kept the black thread for this step, but you could switch to a matching orange if you want. It doesn't matter either way. 
To add some pizazz, let's sew on some sequins!! I found this zig zag sequin trim and it turned out perfect, I think! Sew the trim on top of the stitching onto the top and bottom of the runner (not the ends).
Start and stop sewing the trim a couple inches after the last line of bats on each side (the ruffles will cover this part). To secure the sequins well so they don't fray, tuck the trim under itself once and sew it down, then sew a line perpendicular to secure it even more.

5. Create Ruffles and Sew
Cut 8 strips of spooky lace 4"x54" (or whatever the width).
Ruffle the fabric by using a 5/8" seam allowance with your tension set to the highest setting and your stitch length set to the longest setting. 
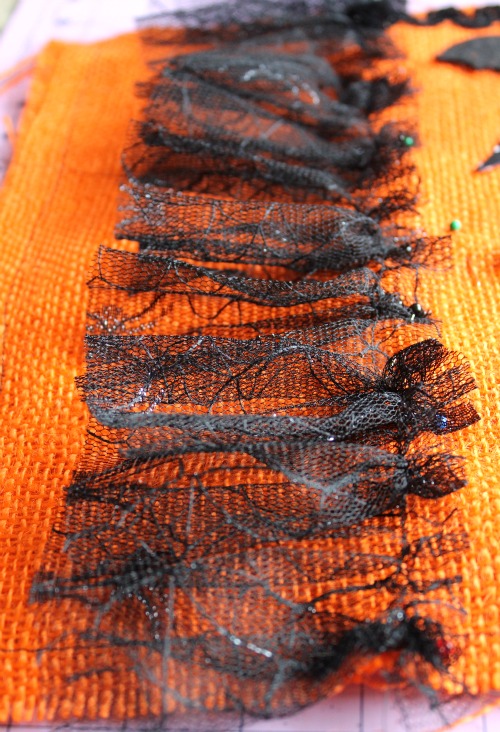
Pull the thread on each end and make the ruffles tighter until each ruffle is the same width as the runner. Pin the ruffle about a half inch away from the last line of bats.
When the first ruffle is pinned, fold it back, and pin the next one directly under the pins of the last one. 
It should now look like this when you fold it back down. Continue those steps until you have 4 ruffles on each side. 
Sew down your ruffles starting with the top ruffle along the stitching from creating the ruffle. Be careful that you remove all pins as you sew and don't sew over any pins from the other ruffles.
When the first ruffle is sewn down, fold it back and sew down the one underneath it. Continue these steps until all 4 ruffles are sewn down. 
Sew the remaining sequin trim on top of the first ruffle along the stitching.
Spooky Ruffles! Who would have thought those existed!!
You will inevitably have this problem on the left so get your lint roller out and clean up those bats. Burlap gets everywhere!
 Then throw it on the table and create your display! 
I hope you love it as much as I do!!
Thanks for reading!!
Be sure to come back tomorrow for a great post by one of Our Creepy Crafty Halloween guests!
It's going to be such a fun week!
Linking this project to the parties on my sidebar and The Idea Room's new party!

Oh! And have you entered this giveaway?!! Go win this cute Boo! Bunting! 
Photobucket
Related Posts Plugin for WordPress, Blogger...

invisible ad