Hello Miss Lovie Readers!!
My name is Bev and I blog over at Flamingo Toes.
My name is Bev and I blog over at Flamingo Toes.
I am so excited to be here today as part of Allie's fun Anniversary party!!
I love to do jewelry, sewing and home stuff - and I have been having a blast this year making new things for Christmas!
I will confess. My ornaments had gotten kind of sad and shabby. And not chic. ;)
I will confess. My ornaments had gotten kind of sad and shabby. And not chic. ;)
So I've been making some new ones this year to freshen things up!
This little ornament is fun and easy to do - it looks so cute on the tree. It would make a great hostess or neighbor gift too!
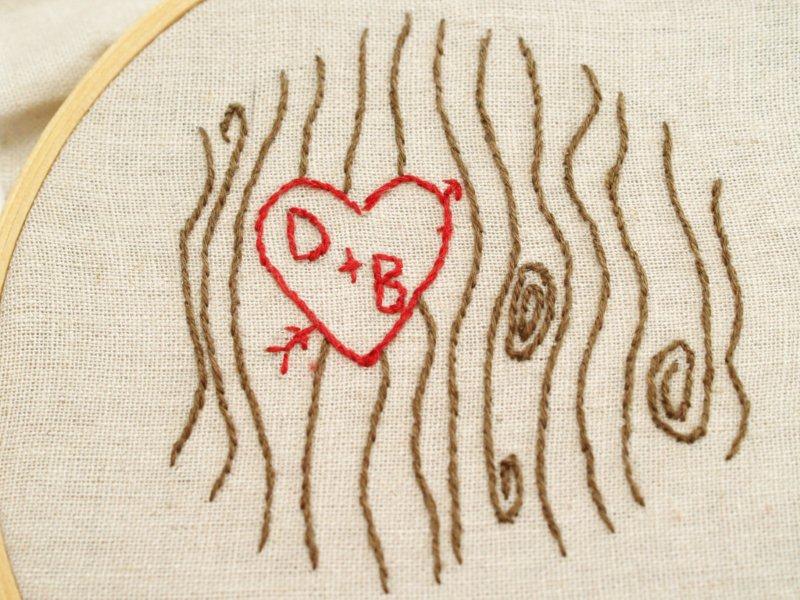
Here's my Carved Heart Ornament:
Here's my Carved Heart Ornament:
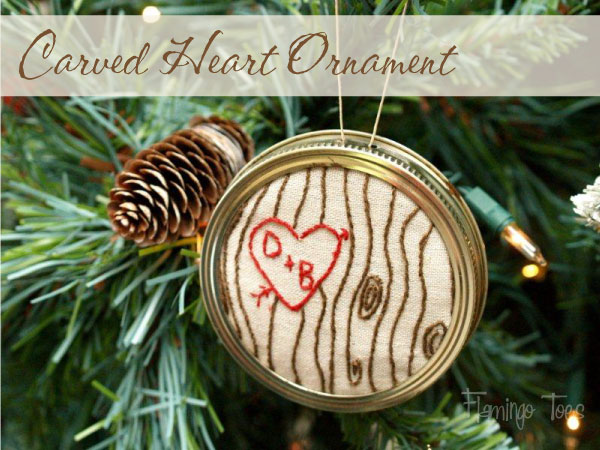
Ok - so it's not a real carved heart - but it's just as sweet, embroidered on linen in this little Mason Jar lid!
Ready to make your own? You'll need:
linen
embroidery hoop
floss - brown & red
Mason Jar Lid - wide mouth (both ring and top)
cardboard or chipboard for backing
glue (I used hot glue)
jute or ribbon for tie
optional - drill
Ornament Pattern - click here to open
linen
embroidery hoop
floss - brown & red
Mason Jar Lid - wide mouth (both ring and top)
cardboard or chipboard for backing
glue (I used hot glue)
jute or ribbon for tie
optional - drill
Ornament Pattern - click here to open
Start by tracing the pattern onto your fabric. You'll need to write in your initials. You can easily trace your pattern if you tape the pattern to a window, then tape your fabric over it. The light will shine through and you can trace the design onto your fabric with a disappearing ink pen.
Place your fabric in an embroidery hoop.
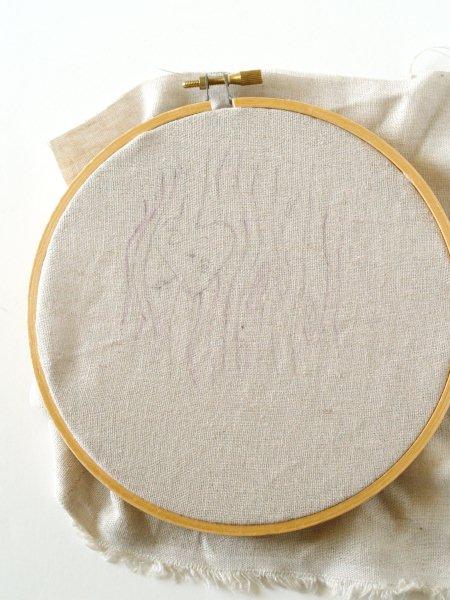
For the entire ornament you'll be using a stem stitch. Here's a quick how to.
Thread your needle with three strands of brown embroidery floss. Bring your thread up from back to front at the top of one of the pattern lines.
Put your needle back in about 1/4 of an inch and then back up about at the middle point of this stitch.
Put your needle back in about 1/4 of an inch and then back up about at the middle point of this stitch.
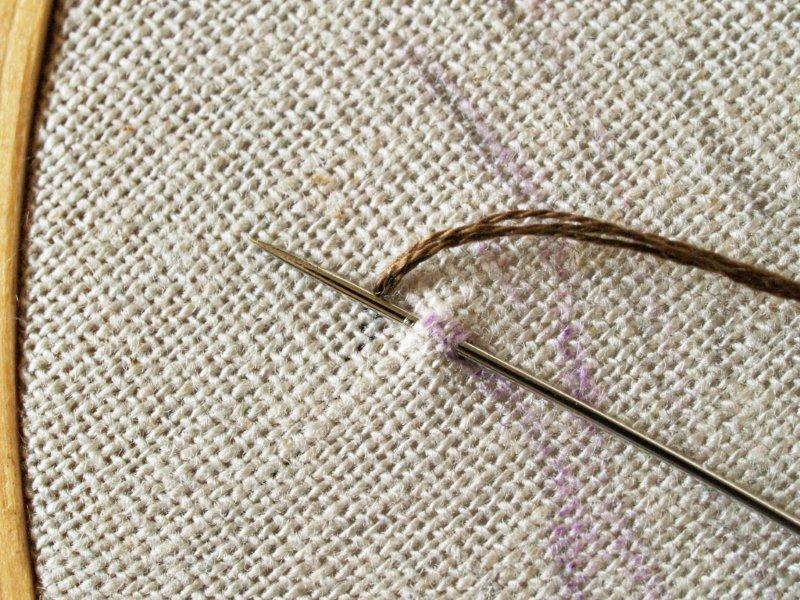
Pull the needle through. Then make another small stitch in the same direction, about 1/8" away, coming up at the base of this stitch.
Keep the loose thread up above your stitches.
Keep the loose thread up above your stitches.
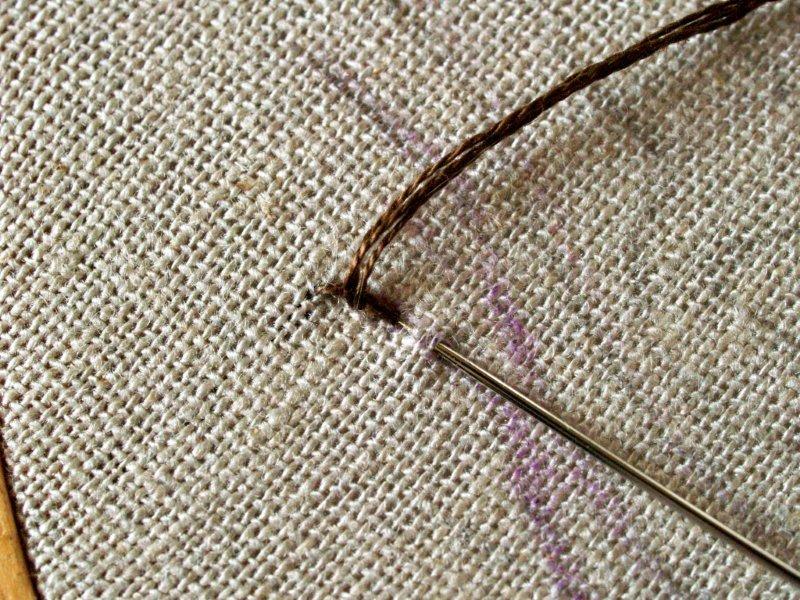
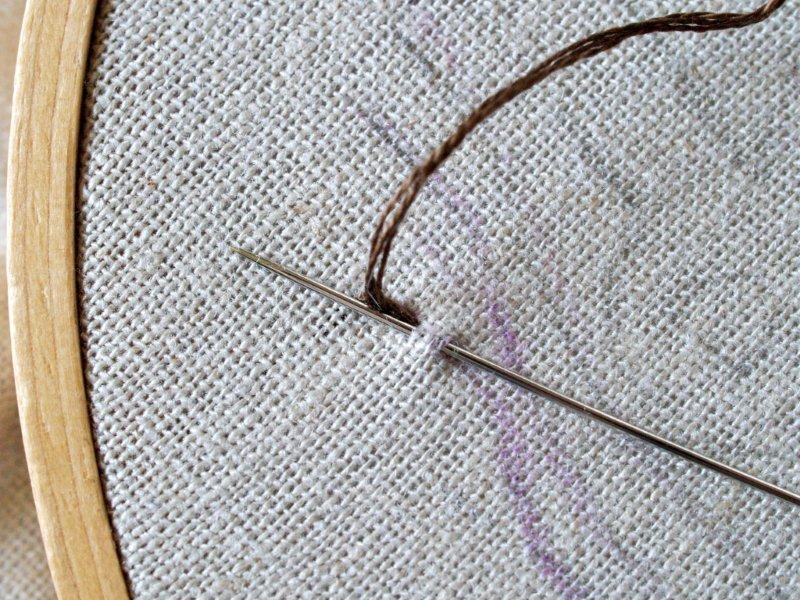
Continue with the stem stitch, following the lines of the pattern.
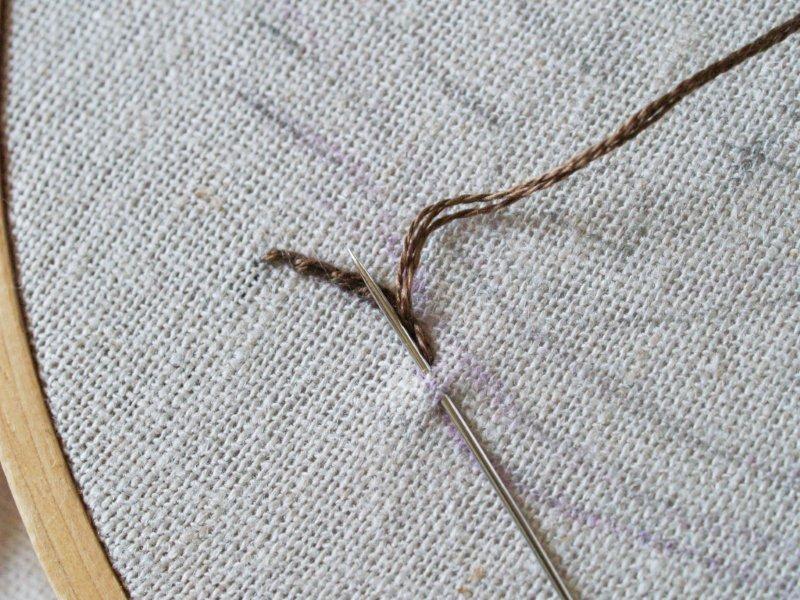
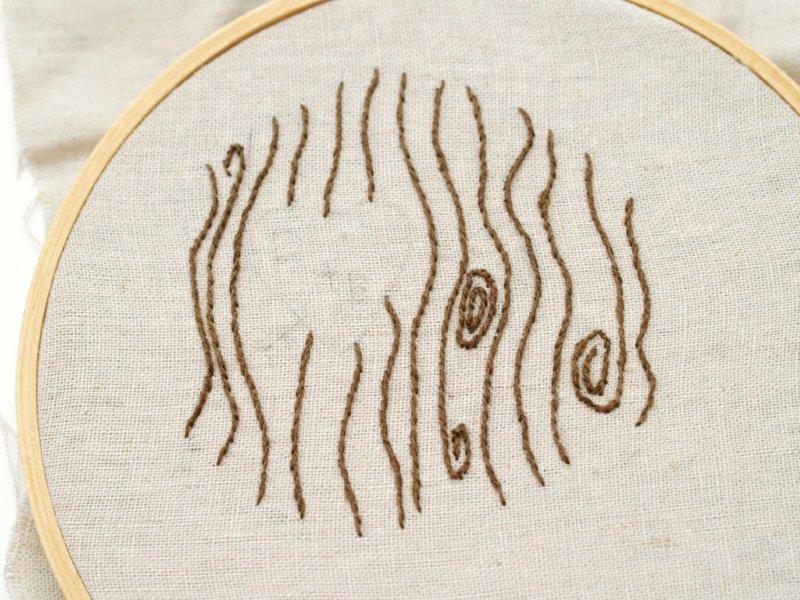
Stitch all the wood grain lines of the pattern. It might help to do smaller stitches on the curves.
Use the same stitch and outline the heart and arrow and sew in your initials with red embroidery floss.
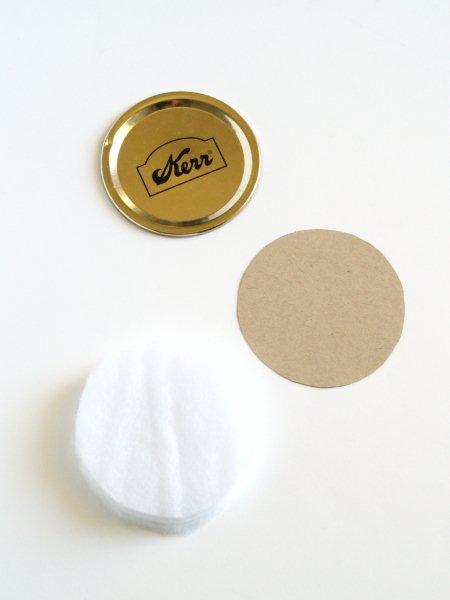
Using your jar lid as a pattern, cut out batting and a cardboard or chipboard circle.
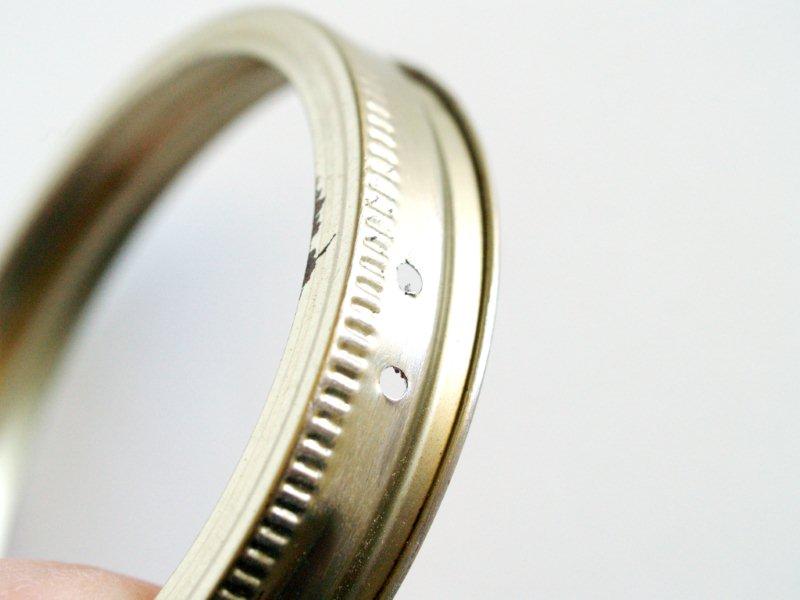
Optional - You can drill small holes in the top of the Mason Jar ring to thread jute for hanging the ornament.
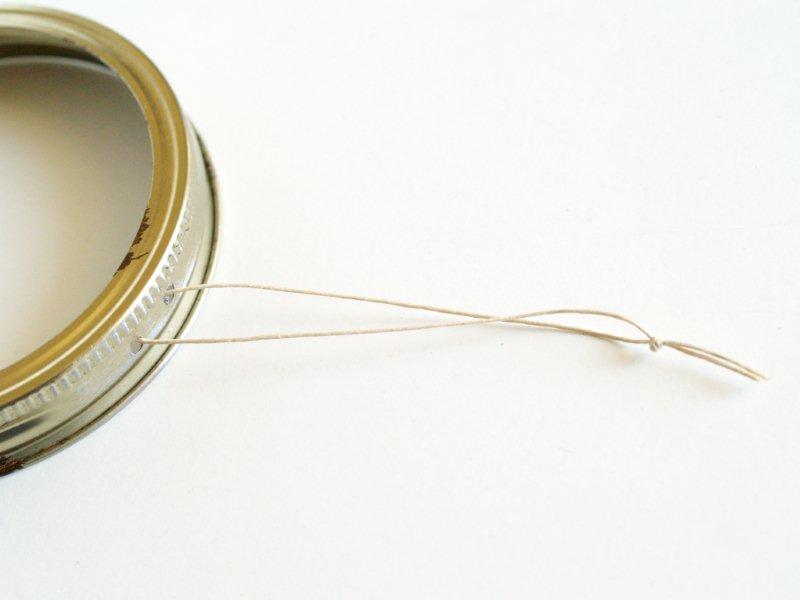
Cut a length of jute and thread it through the holes and knot it.
Trim your fabric so it is a few inches larger than the jar lid.
Place the batting on the lid and then the embroidered fabric. Wrap it around to the back and glue down.
Place the batting on the lid and then the embroidered fabric. Wrap it around to the back and glue down.
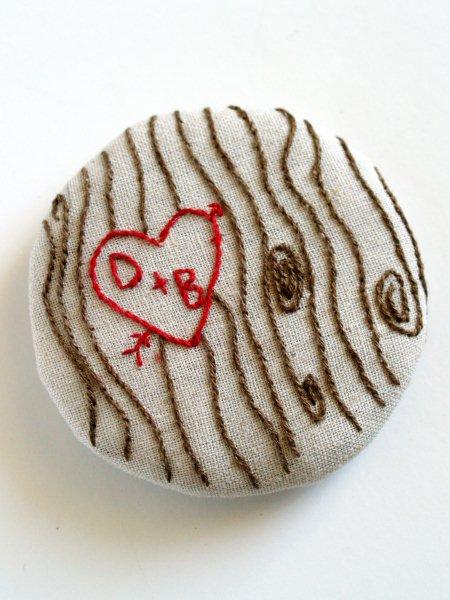
Glue the embroidered circle into the jar ring. Glue the cardboard circle onto the back.
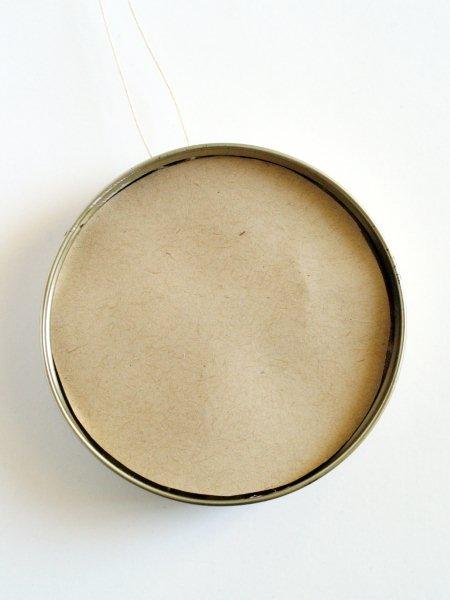
If you didn't drill your holes, glue a length of jute/ribbon to the back for hanging.
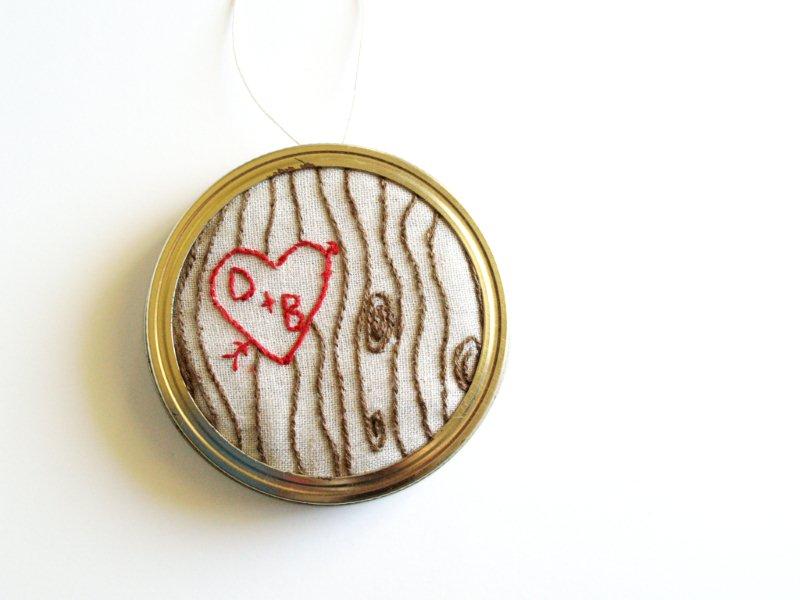
Hang your cute new ornament on the tree!
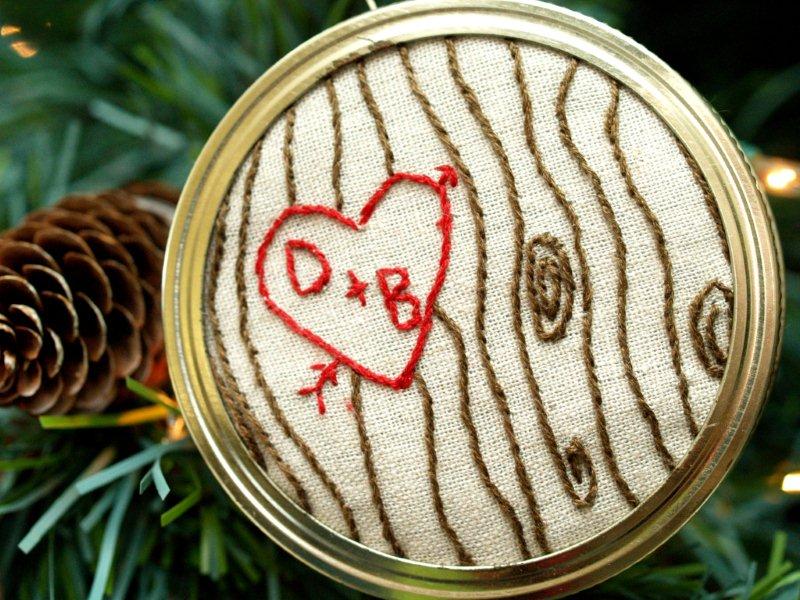
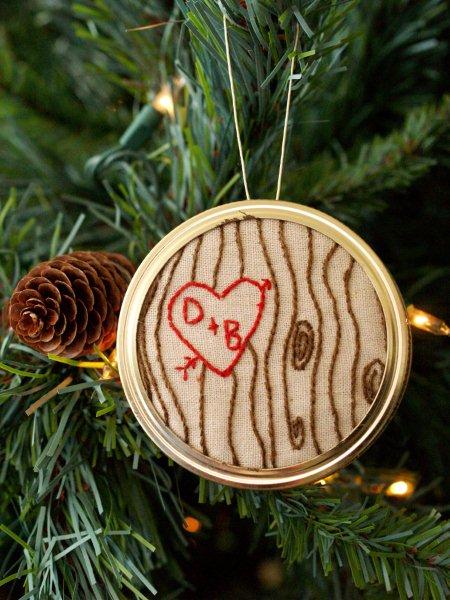
I hope you like it!
I'd love for you to come by Flamingo Toes sometime to say hi! You can check out my other tutorials here. :)
Happy Anniversary Allie!! Thanks so much for including me in the event!!
-------------------------------------------------------------------
Thanks so much for joining in the celebration, Bev!! What an original, unique and sweet idea for an ornament!! I love doing embroidery. Yours looks so great!
I'm sure you already know this but Bev has some of the greatest ideas on her blog. I always think of her as the awesome knockoff jewelry maker because, well, she is. I have a ton of her great jewelry tutorials pinned. She also has some more great Christmas ideas up this year. Go check out her Swirled Wire Chain Ornament, Linen and Lace Topiaries (which I think I am in love with), and her precious Felt Hot Cocoa Ornament that I want to make in every color.
Thanks for reading and be sure to check out the fabulous giveaways!!


And here are the rest of the posts from this week's Anniversary Event! Click on the picture to check them out!

-------------------------------------------------------------------
Thanks so much for joining in the celebration, Bev!! What an original, unique and sweet idea for an ornament!! I love doing embroidery. Yours looks so great!
I'm sure you already know this but Bev has some of the greatest ideas on her blog. I always think of her as the awesome knockoff jewelry maker because, well, she is. I have a ton of her great jewelry tutorials pinned. She also has some more great Christmas ideas up this year. Go check out her Swirled Wire Chain Ornament, Linen and Lace Topiaries (which I think I am in love with), and her precious Felt Hot Cocoa Ornament that I want to make in every color.
Thanks for reading and be sure to check out the fabulous giveaways!!


And here are the rest of the posts from this week's Anniversary Event! Click on the picture to check them out!


Wonderful ornament! The carved heart on the tree embroidery design is very special and perfect for Xmas tree! It gives nice ideas also for other projects :-)
ReplyDeleteThank you for sharing it!
Laura
I love it! Such a cute idea. And I love that its framed in a Mason jar lid!! Very creative! Bev almost makes me think I could embroider something like this. ;)
ReplyDeleteJust darling! I am loving wood grain right now, so this is right up my alley!
ReplyDeleteThat is just adorable! I went out and bought some supplies to make one this morning. It's been a while since I've done any embroidery, but this looks simple enough, and so cute! Thanks for the tutorial :-)
ReplyDeleteMY WORD! THis is fantastic!!
ReplyDeleteSo cute! I love it.
ReplyDelete